
Let’s Get Started - Login
Open your internet browser (Chrome, Firefox or Safari) and enter the following URL:
https://inasbay.com/vendor.php
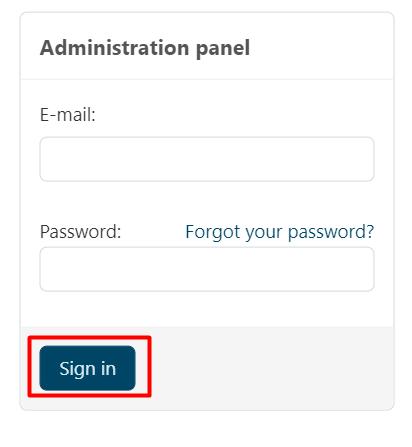
You will be redirected to the following webpage.
- Enter your Email Address.
- Enter the Password.
- Click on the Sign In button.
- You will be redirected to the Dashboard upon successful login.
Update/Reset Password
In case you have lost your password, follow the steps below.
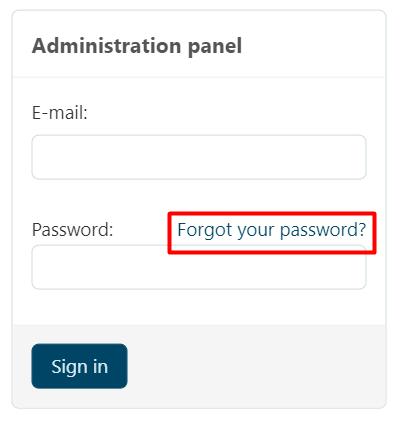
On the Login page, click on the Forgot your password? hyperlink as shown in the image.
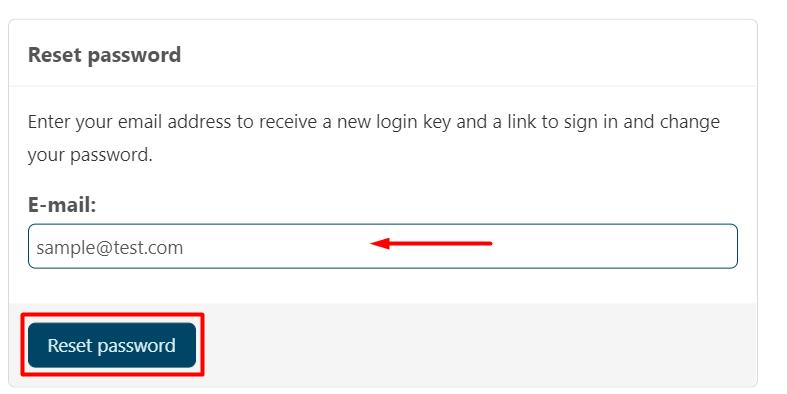
Enter your email address into the textbox and click on the Reset Password button.
You will receive an email from the website with instructions on resetting your password.
In case you do not receive email in your Inbox, make sure to check the Spam/Junk folder.
Dashboard
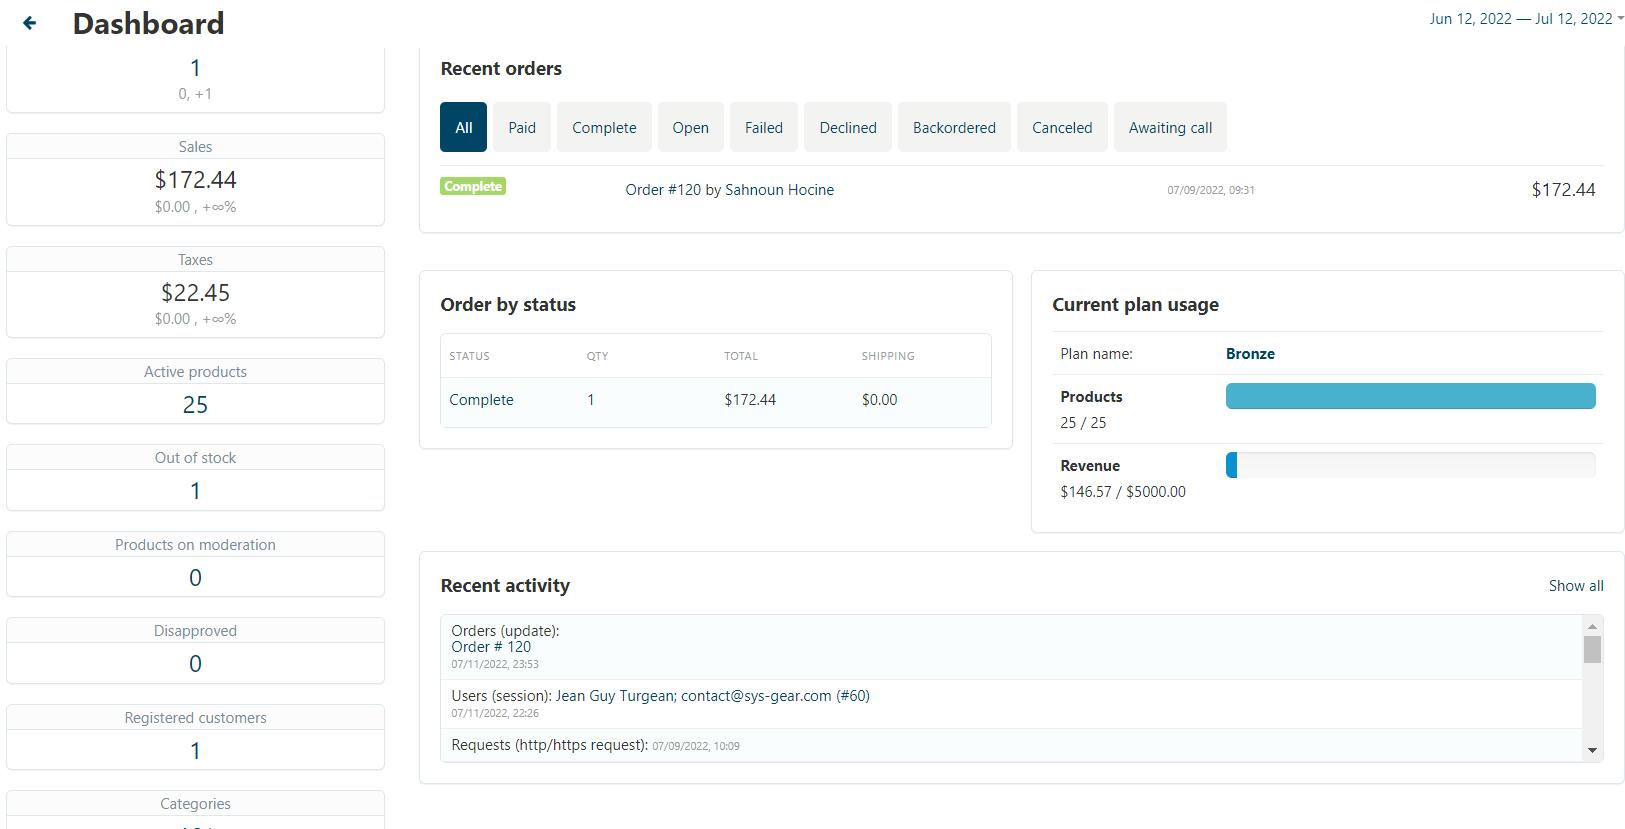
After you successfully login to the website, you will be redirected to the following page. This is your dashboard briefly providing insight to your website.
The left menu includes the available options such as Orders, Products, Settings etc.

You can scroll down, and view information related to recent orders, current plan usage & recent activity. Below is the sample image for your reference.
Manage Orders
In this section, you will learn about managing your orders.
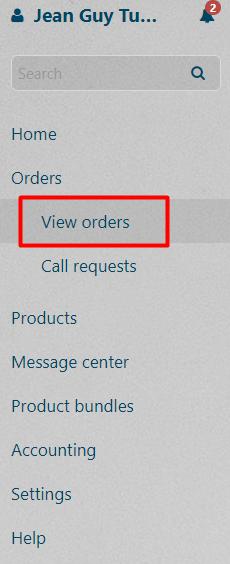
To access all orders, click on the Orders from the left menu as shown in the image below.
Now, click on the View orders menu.
View Orders
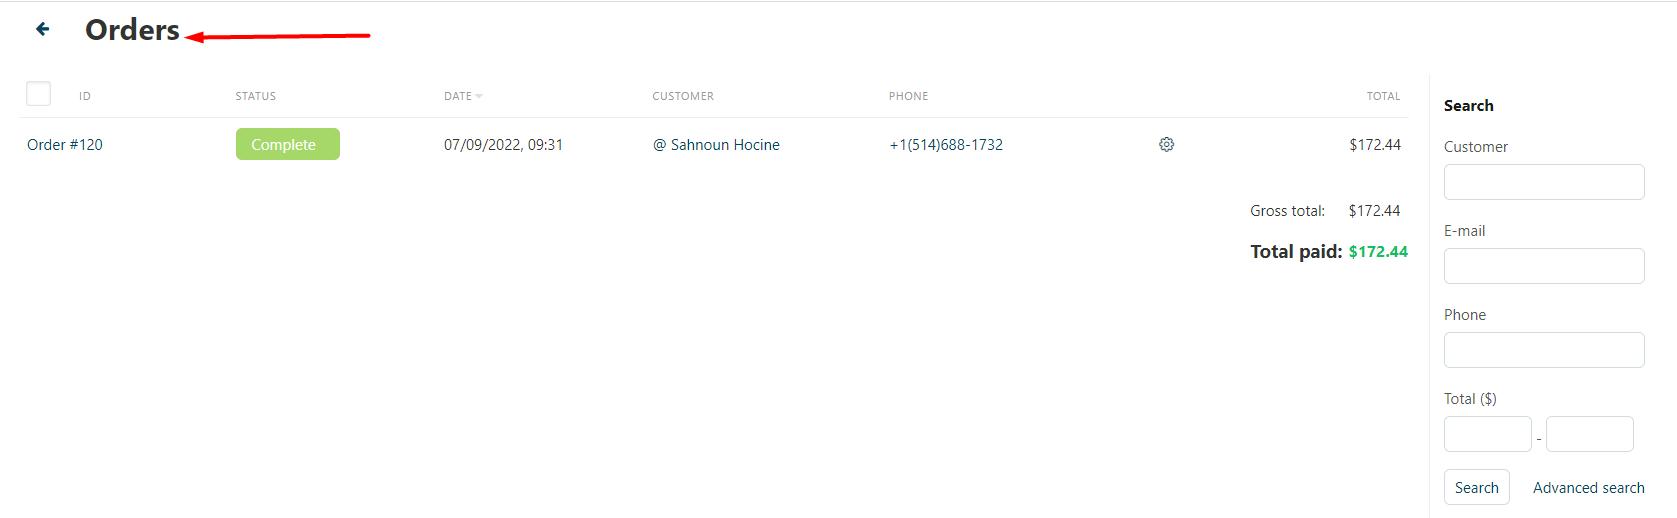
When you open the Orders → View orders section, the system automatically lists all orders from the database, i.e. the orders that have ever been placed and not deleted. By default, the list is arranged according to the date when the orders were placed, with the most recent orders at the top.
Quick Order Status Update
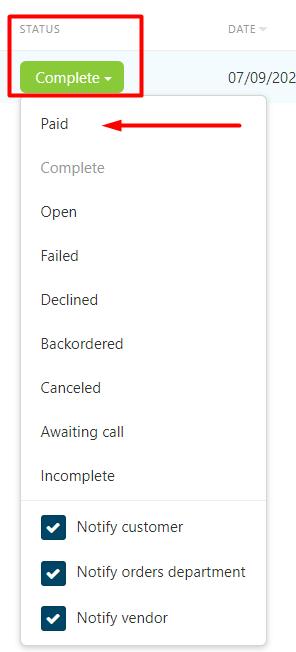
You can quickly update the status of the order by clicking on the Status and selecting new status from the dropdown list.
Order Details
Click on the order on the View Orders list page and you will be redirected to the detail page of the order.
There are four tabs available on the view orders page: General, Add-ons, Promotions and Communication with customer.
If you make any changes to the order, make sure to click on the Save changes button.
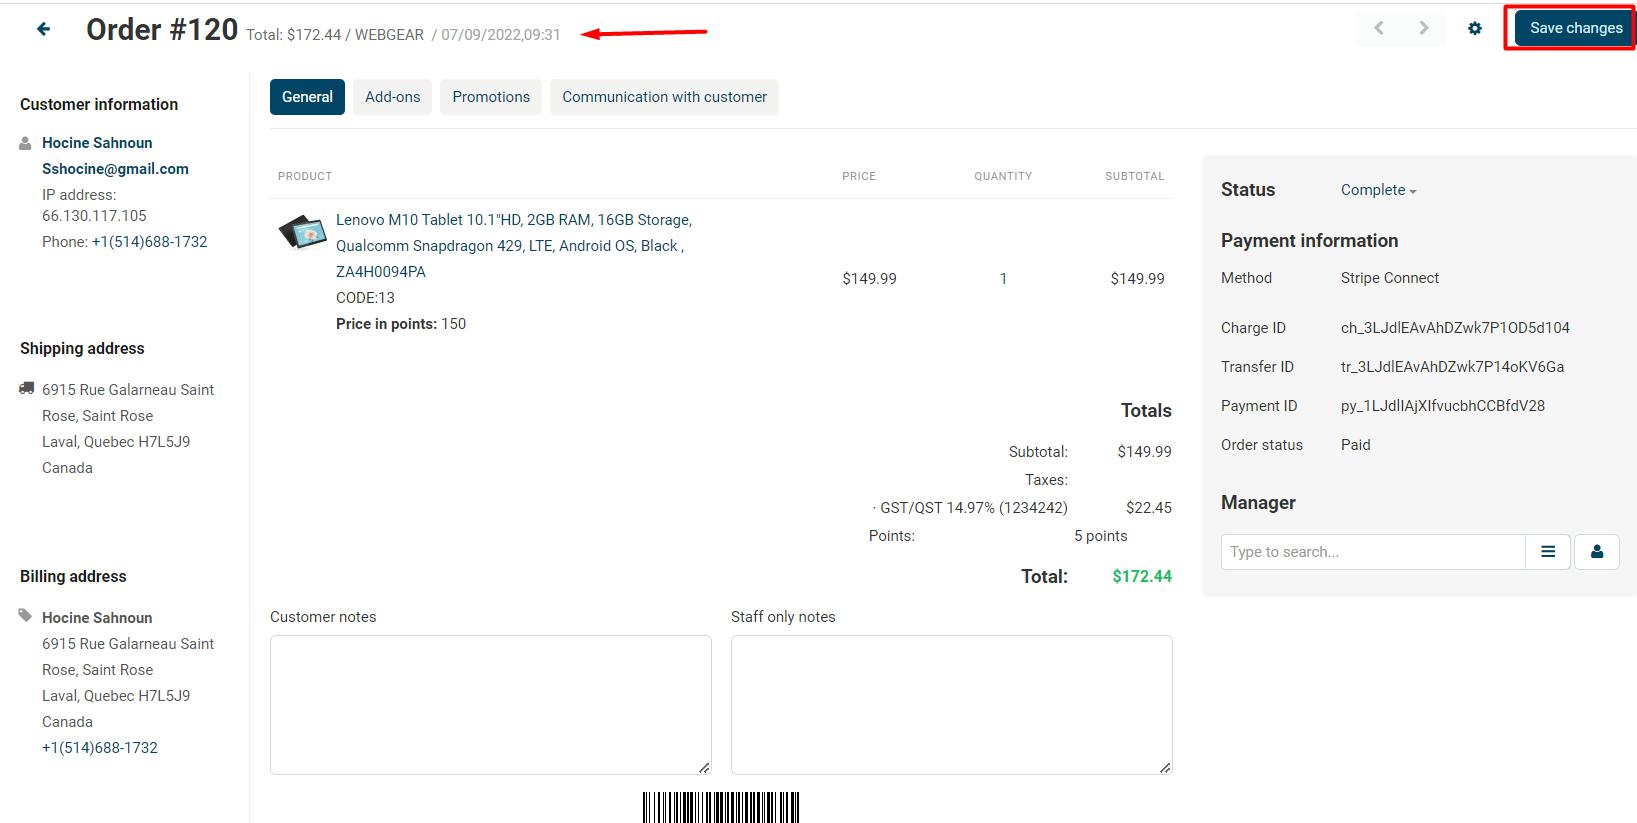
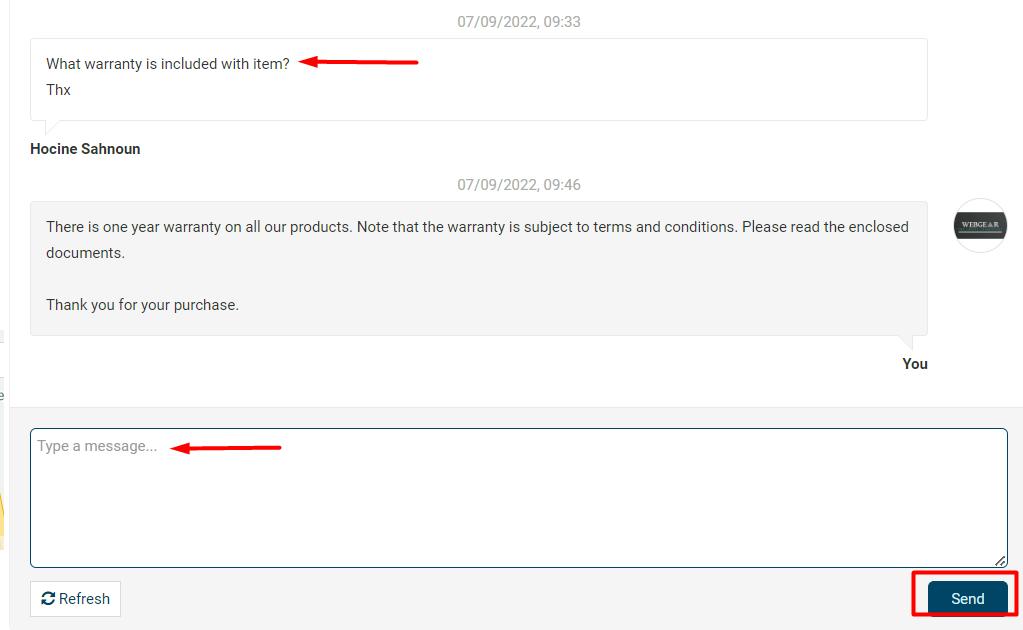
In case there is any message/query from the customer, it will appear under the Communication with customer tab.
In following example, one customer has asked for the warranty. You can type your message as an administrator in the textbox and click on the Send button. Your message will appear instantly.
Call Requests
Here you can access the list of all call requests. Customers make those requests by clicking the Request call link on the storefront.
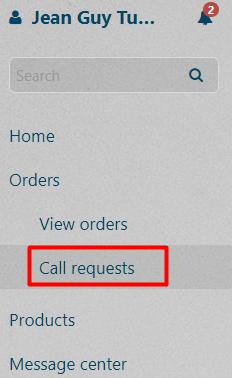
To access, click on the Orders from the left menu as shown in the image below.
Now, click on the Call requests menu.
You will be redirected to the following page where you can view list of all call requests.
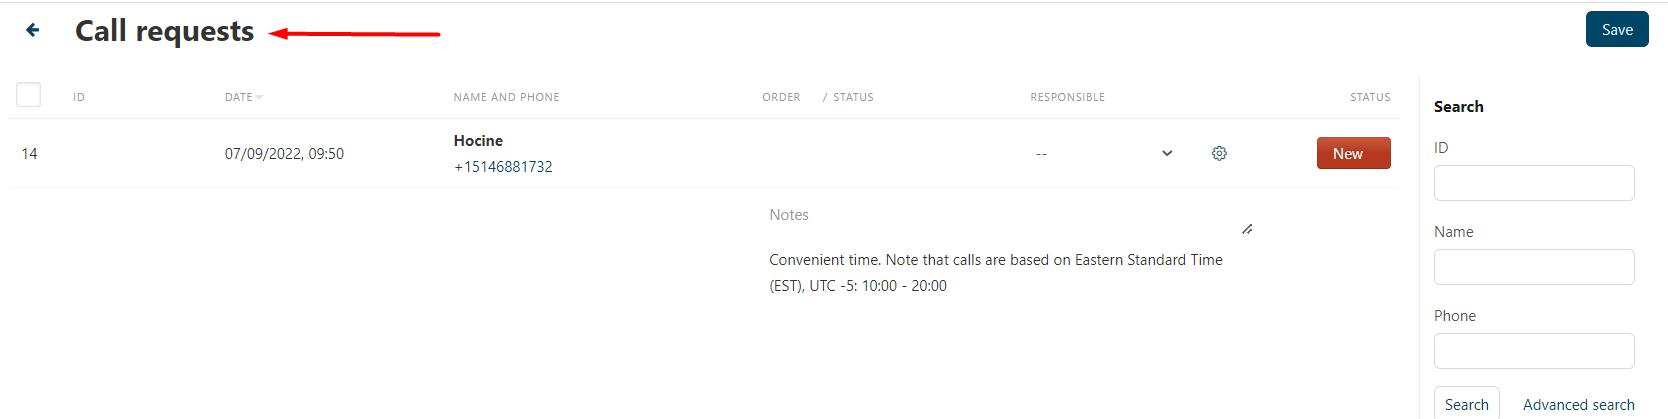
Following information is available on the list:
- ID — the identifier of the request.
- Date — the date and time when a request was made.
- Name and phone — the name and phone of a customer who sent the request (if this data was provided).
- Order/Status — the identifier and status of the associated order.
- Responsible — an administrator responsible for contacting the customer.
- Status — the status of a call request.
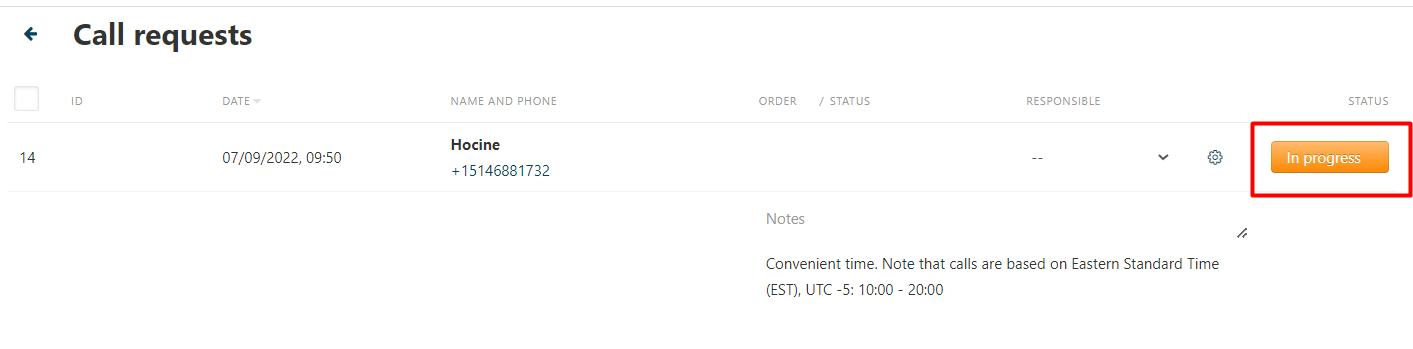
You can also update the status of the call by clicking on the Status dropdown and selecting the appropriate value.
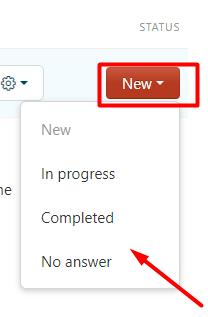
For example, we changed the status from New to In progress. This is how it will appear on the list.
Manage Products
In this section, you will learn about searching for products, adding a new product, editing and deleting existing product.
To access all products, click on the Products from the left menu as shown in the image below.
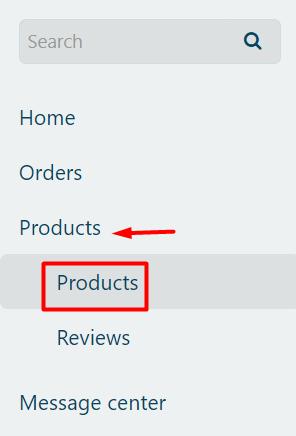
You will be redirected to the products page.
Search for Product(s)
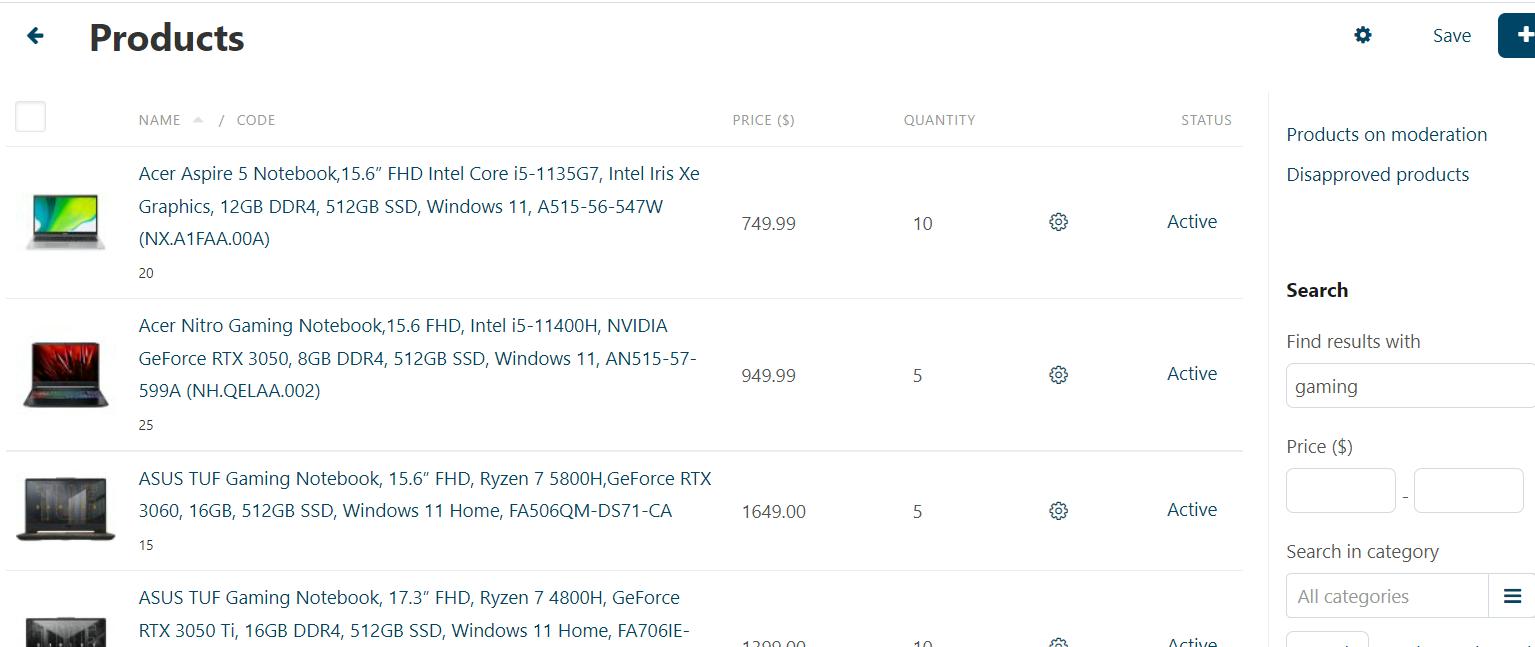
You can search for specific products by using the search filter available on the right-side of the web page.
You can enter keyword in the textbox to find results with.
Enter the price range in the Price ($) textboxes.
You can also select categories from the list.
Click on the Search button to filter the products.
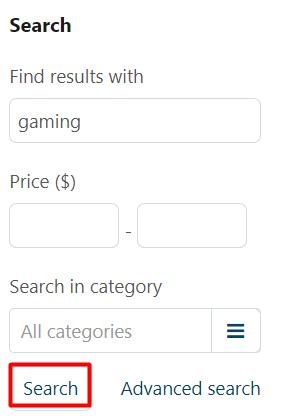
For example, we searched for gaming laptops within price range of 900 to 1400. Here are the search results:

Add New Product
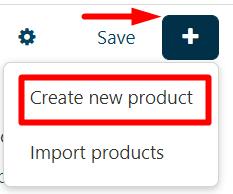
To add a new product, click on the “+” icon available at the top-right side of the webpage.
Click on Create new product.
You will be redirected to the page with multiple tabs and fields
General
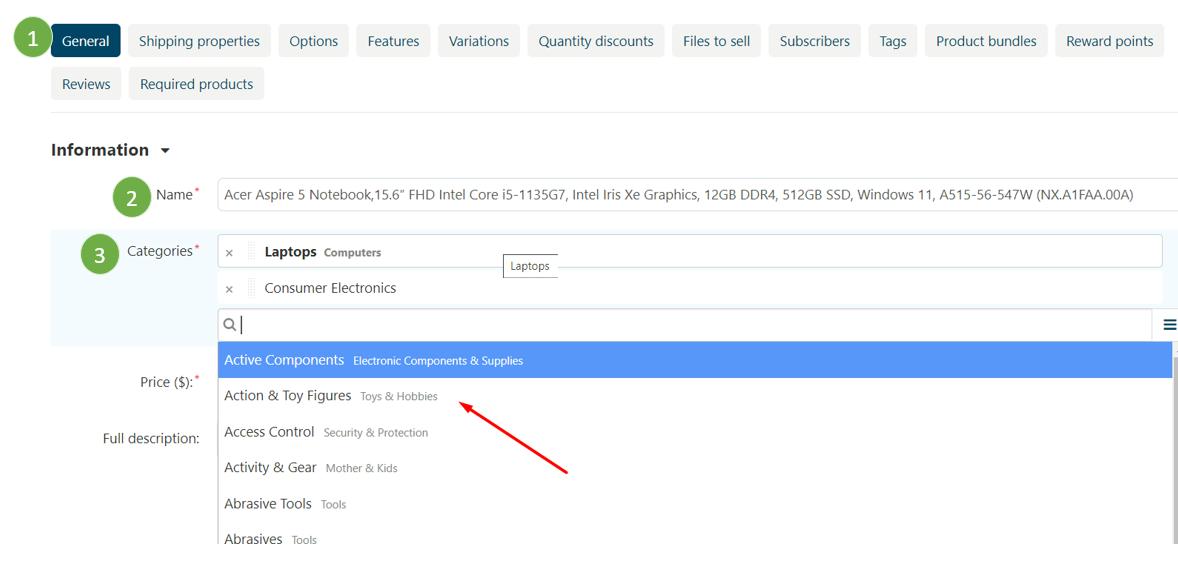
- The first tab for General is selected by default.
- Name: In this textbox, specify the name of the product as it appears on the storefront and in the Administration panel. The name of the same product can differ, depending on the storefront and language.
- Categories: the categories that the product will be assigned to can be selected from here. When a product has multiple categories, the first category on the list will be the main category for the product. To change the main category, just drag another category in its place. Use the search bar to select the desired category.

- Price ($): In this textbox, specify the base price of the product in your store’s primary currency. Prices in other currencies are converted automatically, according to the exchange rate that you specify. All calculations are done in the primary currency.
- Full description: Enter the product description that will appear on the product details page of the storefront. The description can be either a plain text or a formatted HTML text. If you’re not familiar with HTML code, you can rely on the visual editor (as indicated by the arrow in the image above): you simply edit product description like a document, and the visual editor adds the HTML code automatically.
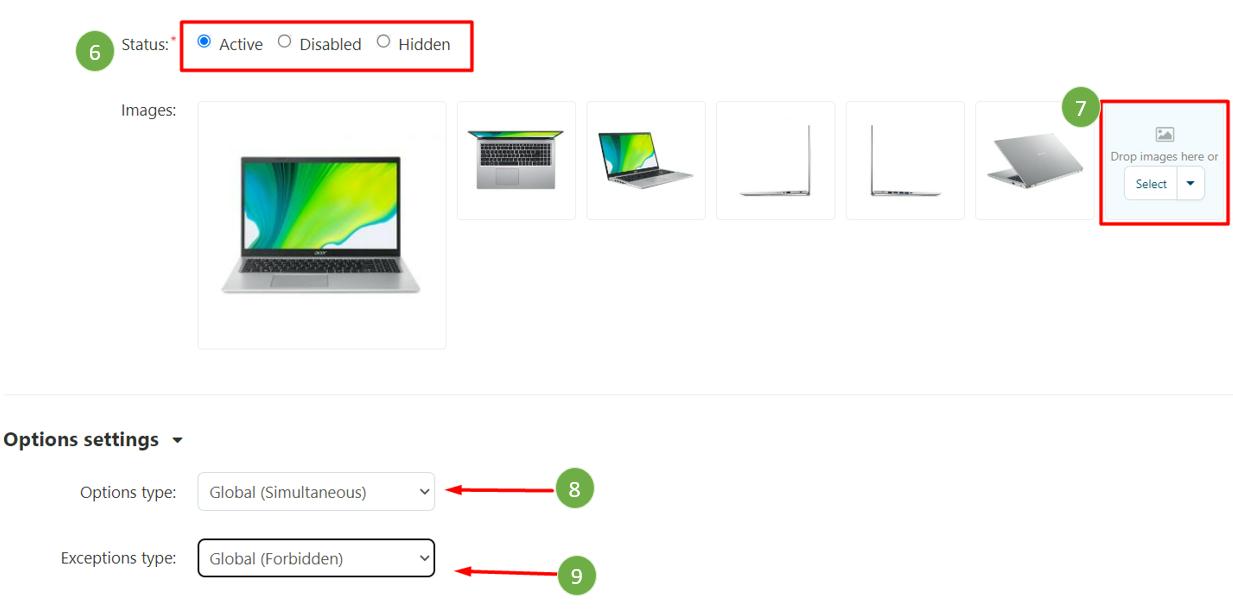
- Status: By default, Active status is selected. There are three status values that can be assigned to a product:
- Active — the product is available on the storefront and appears in the product list.
- Disabled — the product is not available on the storefront.
- Hidden product does not appear in the product list on the storefront. Customers can reach a hidden product via a direct link.
- Images: You can drag & drop images in the section or add images from server or URL. Also, option for deleting all images is available as shown in the image below.
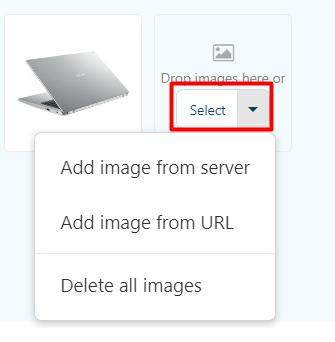
Supported formats are JPEG, GIF, and PNG. The maximum size of an uploaded image depends on your server configuration. As a rule, it should not exceed 2 MB. Thumbnails for these images will be generated automatically.
One of the uploaded images will appear larger than the others. That’s the main product image that is displayed on the product list and on the product details page by default. To change the main image, simply drag and drop another image in its place. You can also change the order of additional images the same way.
- Options type: select how the options and variants of this product appear and work on the storefront:
- Simultaneous—customers can choose the variant for each option independently and in any order.
- Sequential—options and variants are chosen one after another: first the variant of the first option, then the variant of the second option, and so on.
- Exceptions type: select a type of the product option exceptions:
- Forbidden—you’ll be able to specify Forbidden combinations on the Options tab. Customers won’t be able to purchase a product when they choose a forbidden combination of option variants.
- Allowed—you’ll be able to specify Allowed combinations on the Options tab. Customers will only be able to select these combinations of option variants.
Next section is related to the Pricing / Inventory.
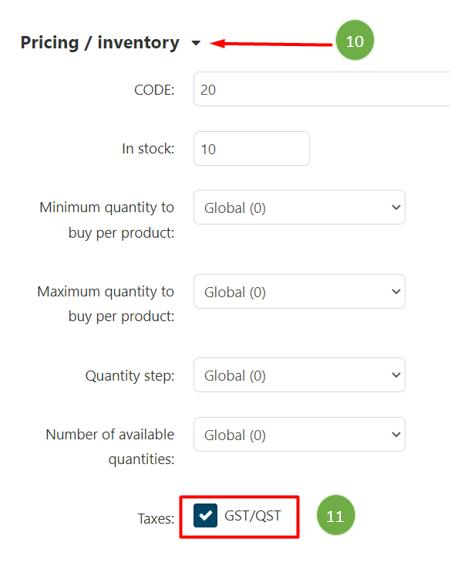
- Pricing / Inventory: following is the list of fields to be specified for a product’s pricing/inventory details.
- CODE—the identifier of the product that you use in your store (a stock keeping unit or SKU); it is used to distinguish products from each other during import, so that the data would be saved to the right product.
- In stock: Products that are in stock and are available for purchase.
- Minimum quantity to buy per product—the minimum number of items that a customer can buy at a time. This number will appear on the product page on the storefront, right after the product price.
- Maximum quantity to buy per product—the maximum number of items that a customer can buy at a time. 0 means no limit.
- Quantity step—determines the step by which a customer can increase or decrease the number of products in cart.
- Number of available quantities—the maximum number of choices in the Quantity drop-down list.
- Taxes: Select this checkbox to apply the taxes to the product.
Next section is related to the Availability of the product.
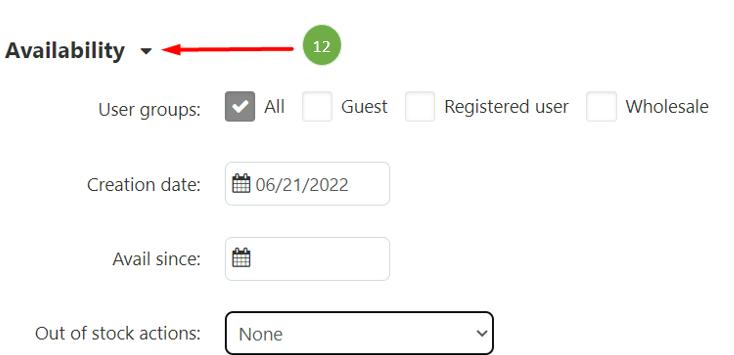
- Availability: following is the list of fields to be specified for a product’s availability.
- User groups— the user groups that can access the product’s page.
- Creation date—the date when the product was added to the catalog. It is used for sorting products by date.
- Avail since— the date when the product becomes available for purchase. It is useful when you want to start selling at a specific date, or when the product isn’t available yet.
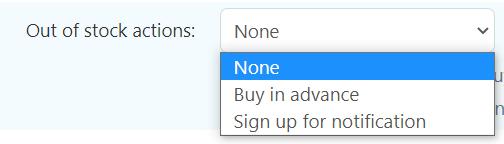
- Out-of-stock actions— select if customers should be able to buy the product in advance before it is not yet available for sale or sign up to receive an email notification when the product is available. Following are the two options available.
Next section is the last one to specify extra information related to the product.
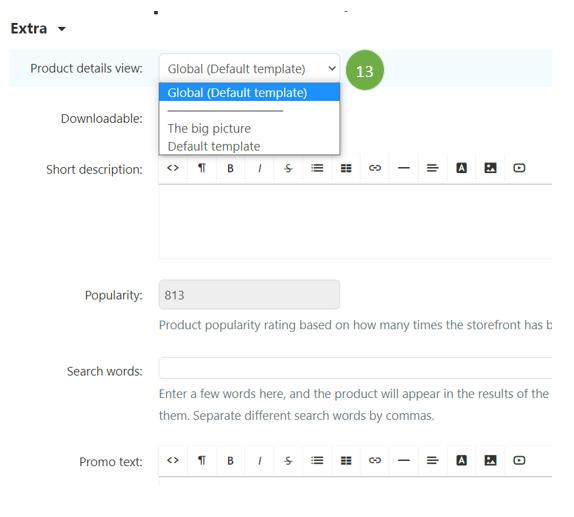
Extra
- Product details view—choose a template (basically, the look) of the product page.
- Downloadable - if this checkbox is checked, the product is labeled as downloadable, i.e. distributed by download.
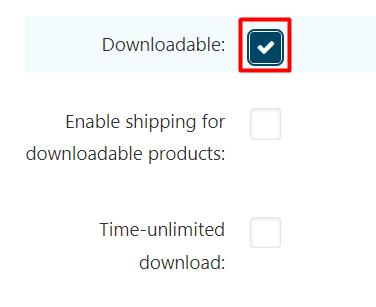
- Enable shipping for downloadable products—if this checkbox is ticked, shipping costs will be calculated for this downloadable product just like for normal products.
- Time-unlimited download—if this checkbox is ticked, the product download period never expires.
- Short description—a short product description; it appears on the product list on the storefront. If you leave this field blank, the short description will be automatically taken from the full product description (first 300 characters).
- Popularity—integer conveying the product popularity, which is calculated automatically. This rating depends on the number of product views as well as the number of times the product was added to the cart and purchased. Products can be sorted by popularity on the storefront.
- Search words—the list of words by which the product should be easily found by the built-in search.
- Promo text—an additional block with information that appears on the top right side of the product page.
Shipping
The second tab is for the information related to the shipping for the product. You will be entering following data which is important for automatic shipping cost calculation.
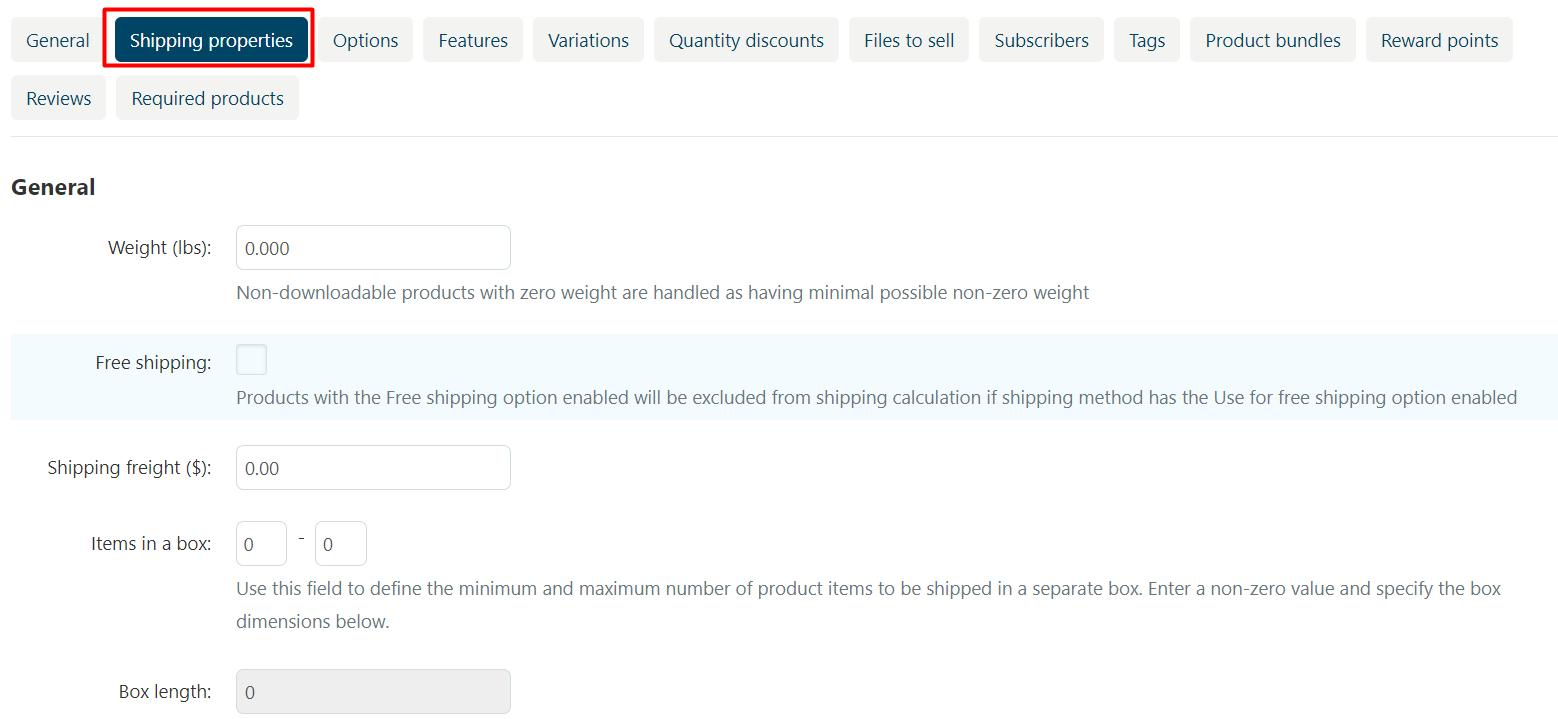
- Weight (lbs)— the weight of a single item in the store’s default weight measurement unit. The default weight measurement unit can be specified under Settings → General.
- Free shipping— if you tick this checkbox, the product will be excluded from the shipping cost calculation, as long as the shipping method has the Use for free shipping checkbox ticked.
- Shipping freight ($)— the handling fee (insurance, packaging, etc.) added to the shipping cost.
- Items in a box— the minimum and maximum number of product items to be shipped in a separate box. Usually it’s 1 - 1 (only one product per box).
- Box length— the length of a separate box.
- Box width— the width of a separate box.
- Box height— the height of a separate box.
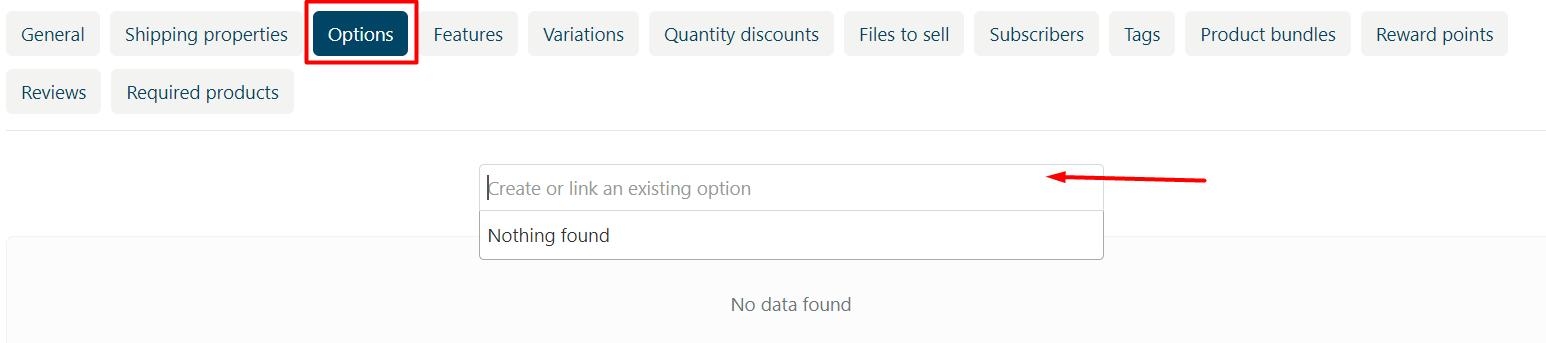
Options
The third tab is called Options. Product options appear on the product details page on the storefront. Depending on the type of an option, customers either select one of the option variants or provide their own variant.
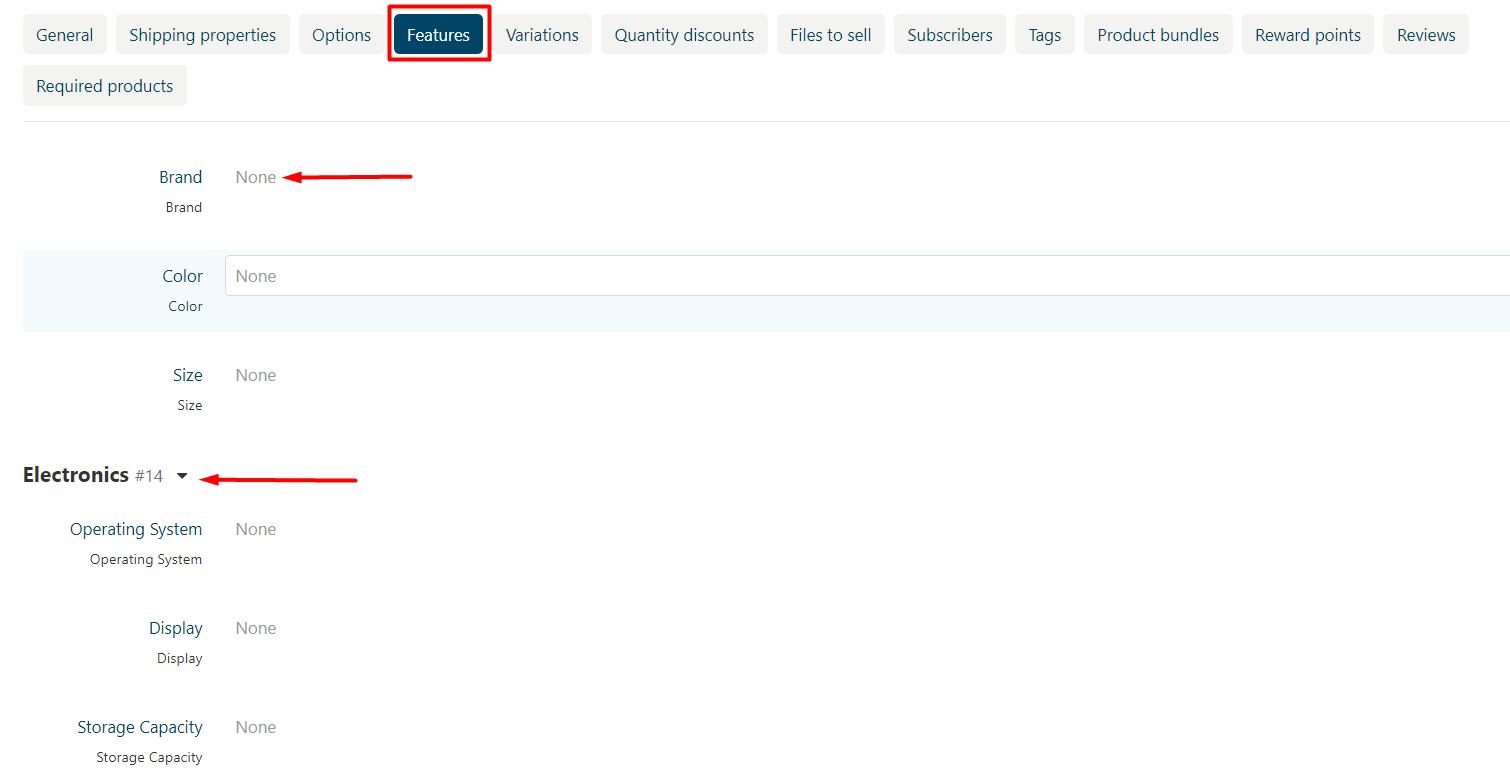
Features
This tab allows you to define the values of the extra fields that are valid for the product. The set of extra fields is controlled in Products → Features. In our example, you need to specify the product’s Brand, Color, Size and data related to Electronics such as Operating System etc.
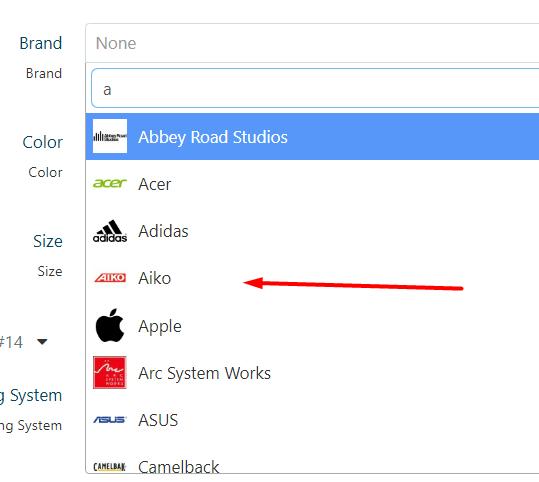
You can search for the specific option by typing in the textbox and select appropriate value.
For example, while entering Brand, following is the sample of information retrieved for you to select from:
Variations
On this tab you can create similar products and add them to the group.

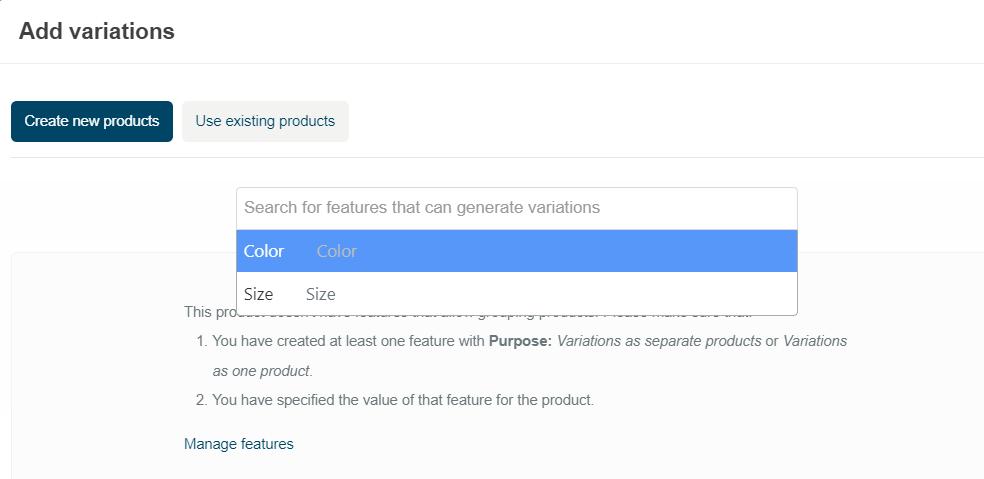
You can either select from the dropdown list or add a new variation by clicking on the + Add variation button. When you click, a new dialog box will appear providing you two options: Create new products or use existing products.
Following is the sample for Create new products:
You can search for features by typing into the textbox.
Quantity Discounts
This tab contains the list of wholesale prices for the product. Customers will see those discounts on the product page on the storefront. Prices apply depending on the number of items of this product in cart.
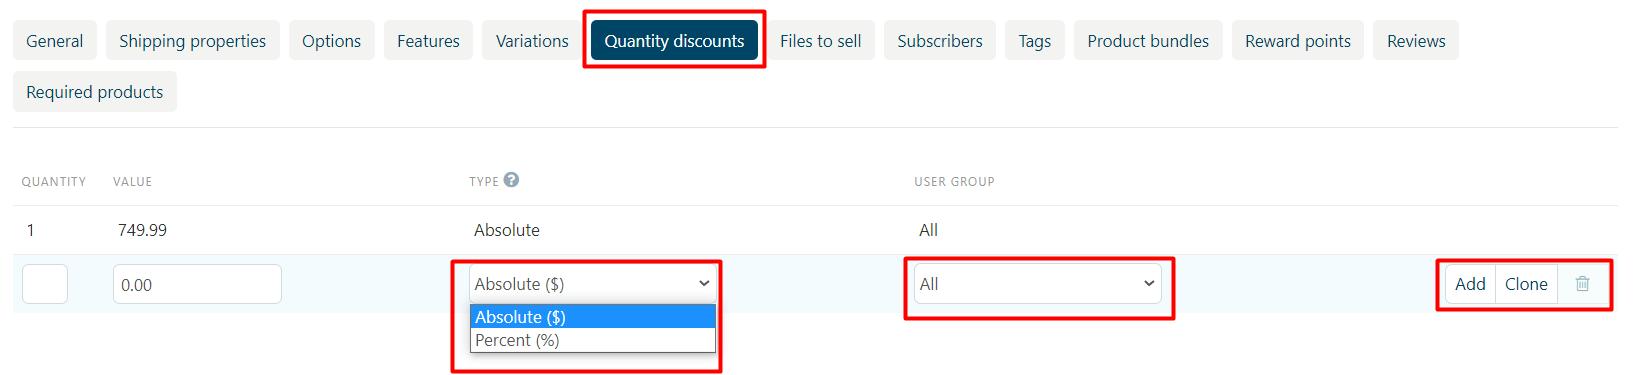
Following is the detail of the fields appearing on the webpage:
- Quantity— the minimum number of product items to qualify for the product wholesale price.
- value— the value of the discount (per item).
- Type— the type of the discount:
- Absolute—the cost of 1 discounted item.
- Percent—the percent discount off the base product item price.
- User group— the user group which can take advantage of the wholesale price.
After selecting the data, click on the Add button to save the changes.
Files to sell
This tab contains a list of files that are associated with this downloadable product.
If there is no data available, use the options for adding a file or folder by clicking on the respective buttons: Add file, Add folder. Clicking them will open a dialog box for you to enter the relevant data.

Subscribers
When a product is out of stock, you may allow customers to subscribe for an email notification. It will be sent automatically to inform the customers that the product is available again.
Each product has its own list of email addresses, available on the Subscribers tab. When a product is in stock again, the notification is sent to all subscribers, and then their emails are removed from the subscriber list of the product.
As you can see, the process is entirely automated. However, you can add subscribers manually, if necessary.
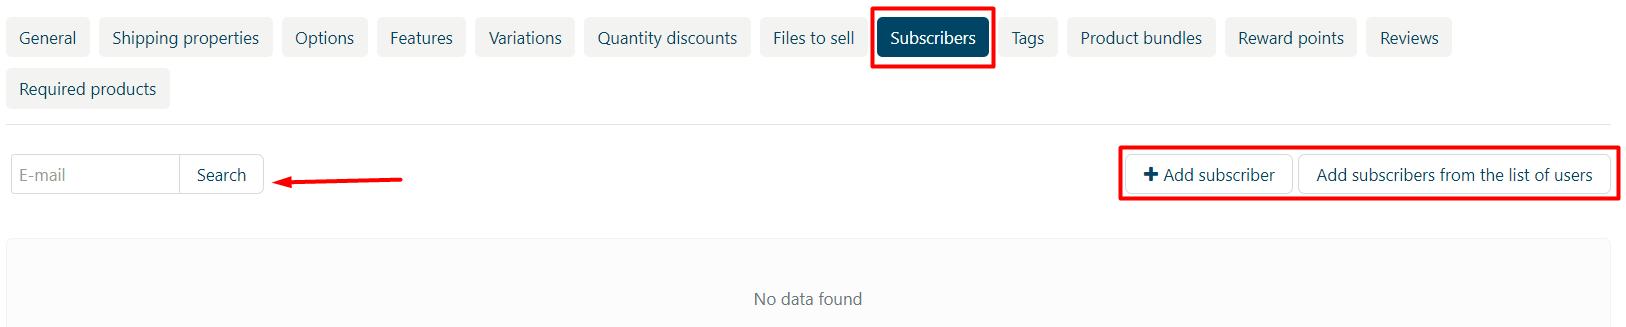
When you click on Add subscriber button, a dialog box appears where you can enter the email address manually. Type the address and click on the Create button.

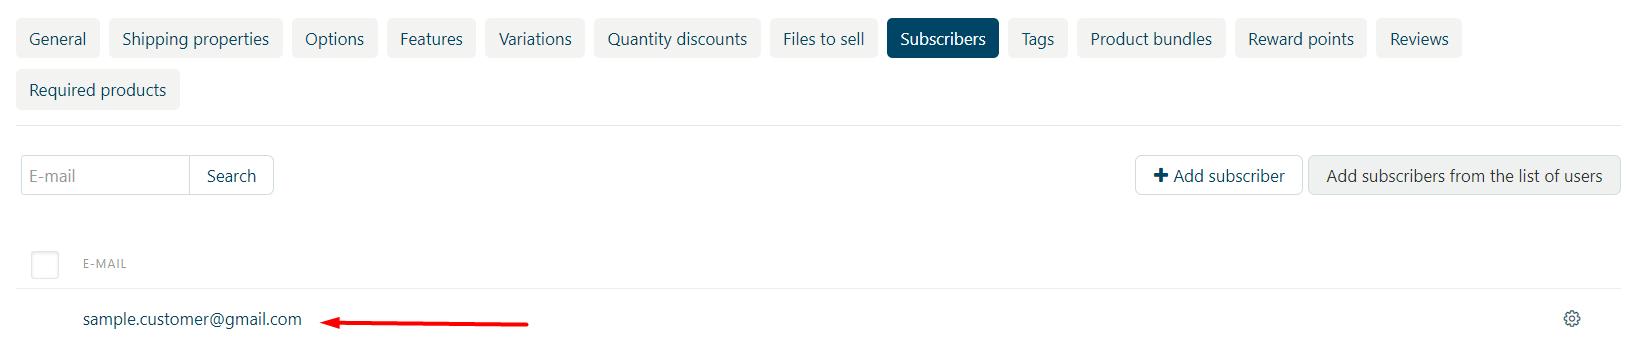
Once added, this is how it will appear on the list:
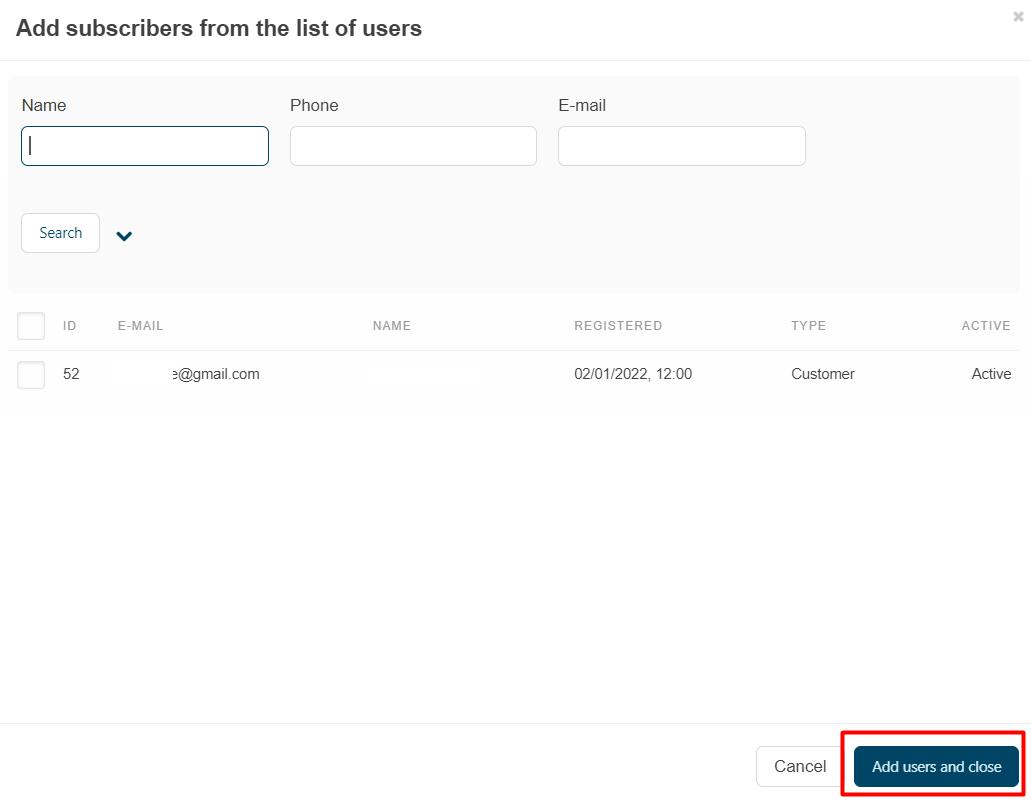
Second option is to add subscribers from the list of users. To do, click on the button for Add subscribers from the list of users and following dialog box will appear:
Search for the users, select and click on the Add users and close button to successfully add the required users.
Tags
This tab includes a list of tags associated with the product. Tags appear on the storefront in the Tags.
- Tags — the tags that have been added to the product. Once you start typing, system will use autocomplete to suggest what existing tag you may be entering. Type and press enter on your keyboard to add the tags as shown in the image below.

Product Bundles
You can select product bundle from the list or add a new one. Click here to read more about managing product bundles.
Reward Points
Use this tab to set up the product price in reward points and specify the number of reward points to be earned for purchasing the product.
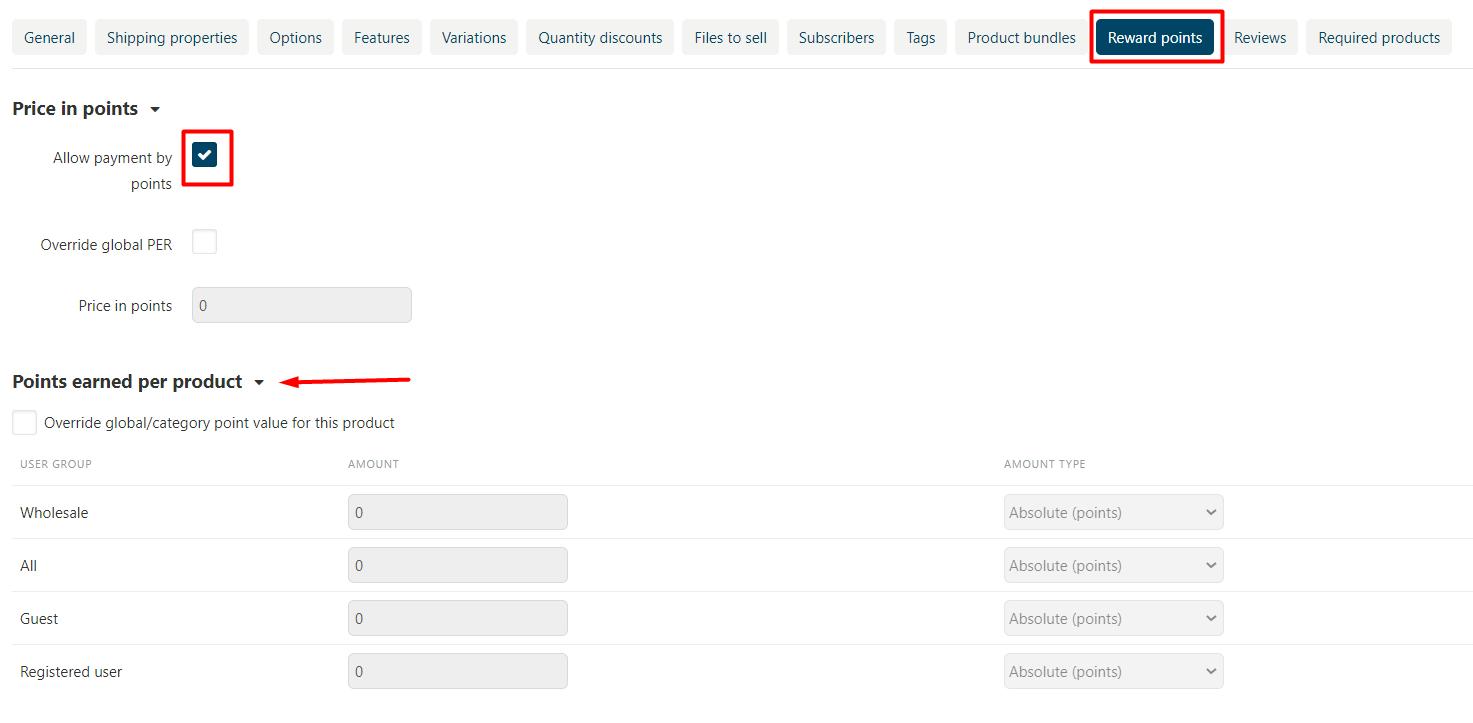
Price in points:
- Allow payment by points— if you tick this checkbox, customers will be able to pay for the product with reward points.
- Override global PER— if this checkbox is ticked, the product will have a fixed price in points, that is independent of the point-to-money exchange rate.
- Price in points— a fixed product price in points.
Points earned per product:
- Override global/category point value for this product— if you tick this checkbox, the values below override the global reward points specified in Marketing → Reward points.
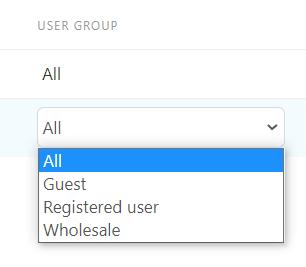
- User group— the user groups, members of which will get reward points for buying the product.
- Amount— the number of reward points to be granted to the user group member who bought the product.
- Amount type— the absolute number of points or percentage-based value calculated in the following manner: the product cost is divided into 100, and the result is multiplied by the value in the field.
Reviews
The list of customers’ reviews of the product appear here.

Required Products
The last tab contains a list of required products, which will be added to cart along with this product. You can search for the product by typing into the textbox and system will show the matching list. Select a product and it will be added as shown in the image below.
You can remove the product by clicking on the X icon.

Once you are done with adding details in all of the required tabs, click on the Save button to save the changes into the system.
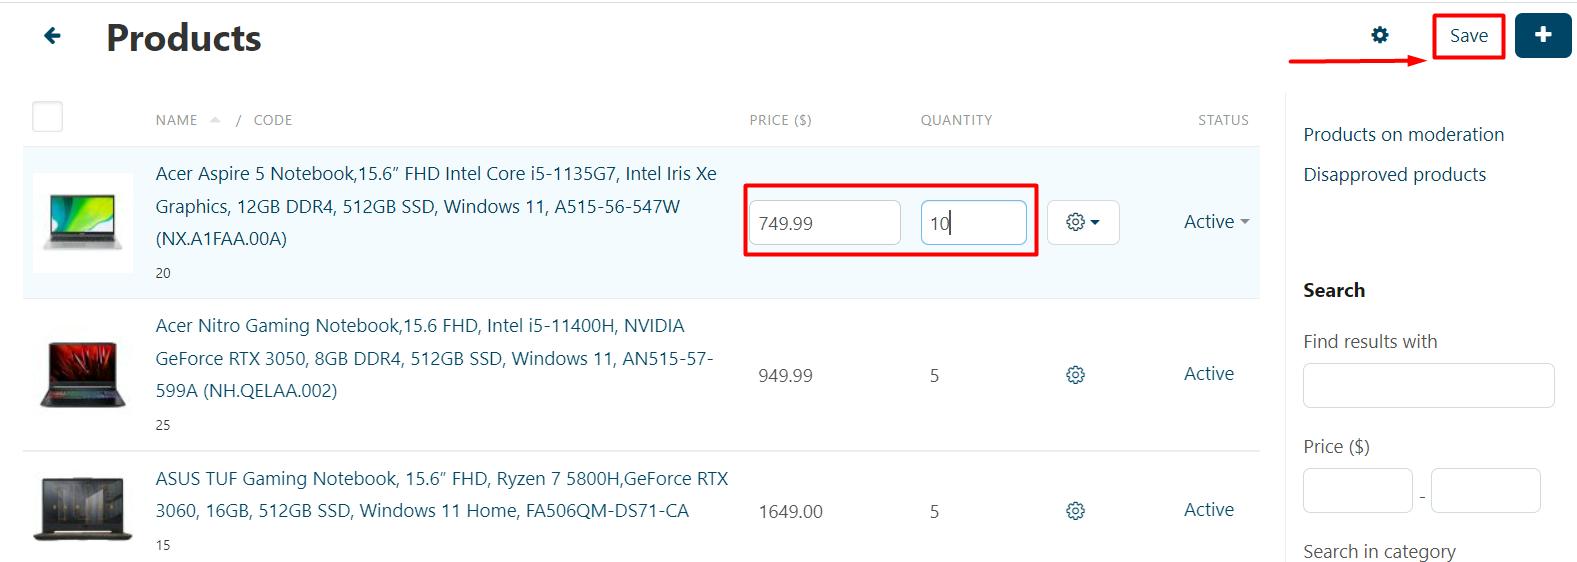
Edit Products from List
You can edit product’s price and quantity directly from the list for quick updates. Hover your cursor on the selected product, update the price and/or quantity as required and click on the Save button available at the top-right side of the webpage. The changes will be saved instantly.
Update Product Status
If you wish to make the updates on all products at once, click on the checkbox at the top row and select the option such as ALL or ACTIVE.
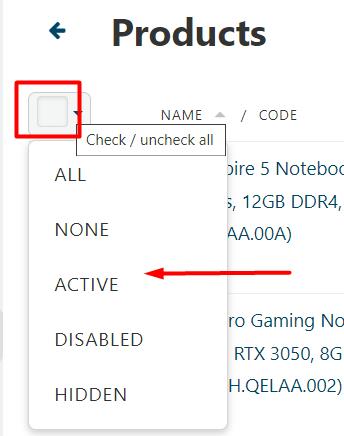
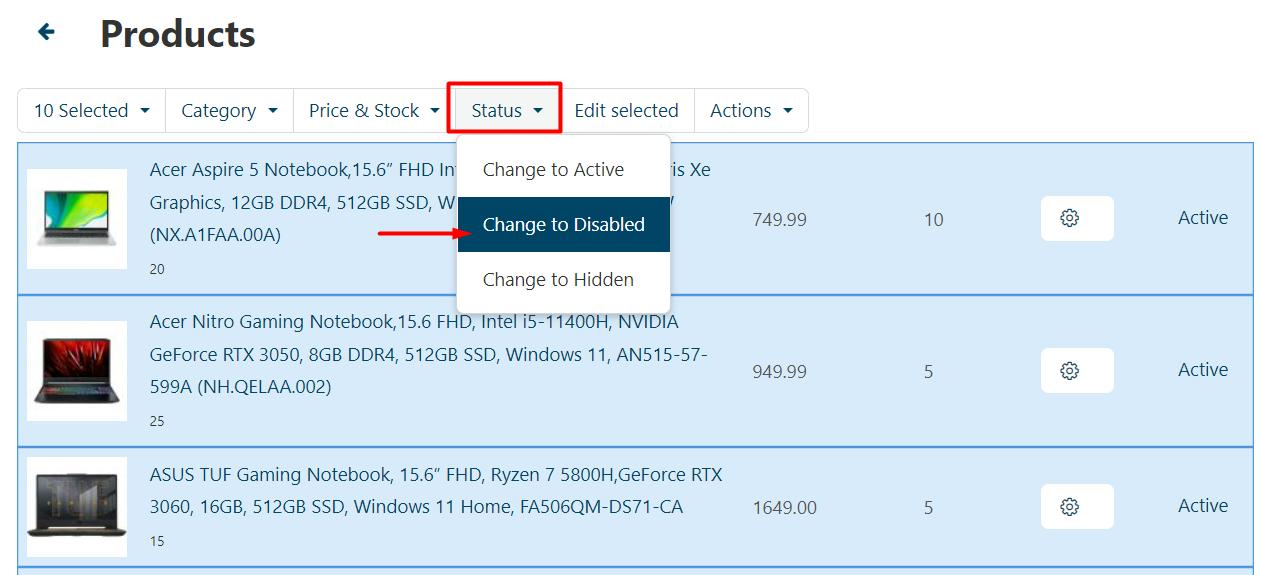
Click on the Status as shown in the image below and select the required status values such as change to Disabled. Doing so, will disable all selected products from the list at once.
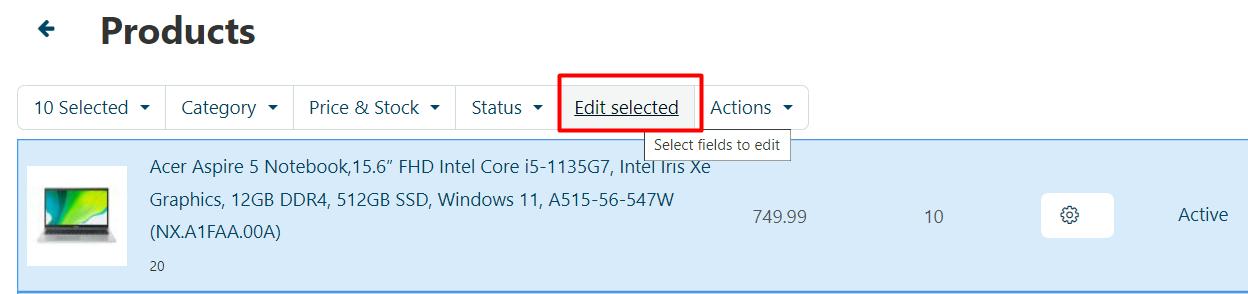
Edit Selected Product Information
To make updates to selected fields for the products, click on the Edit Selected option as shown in the image below.
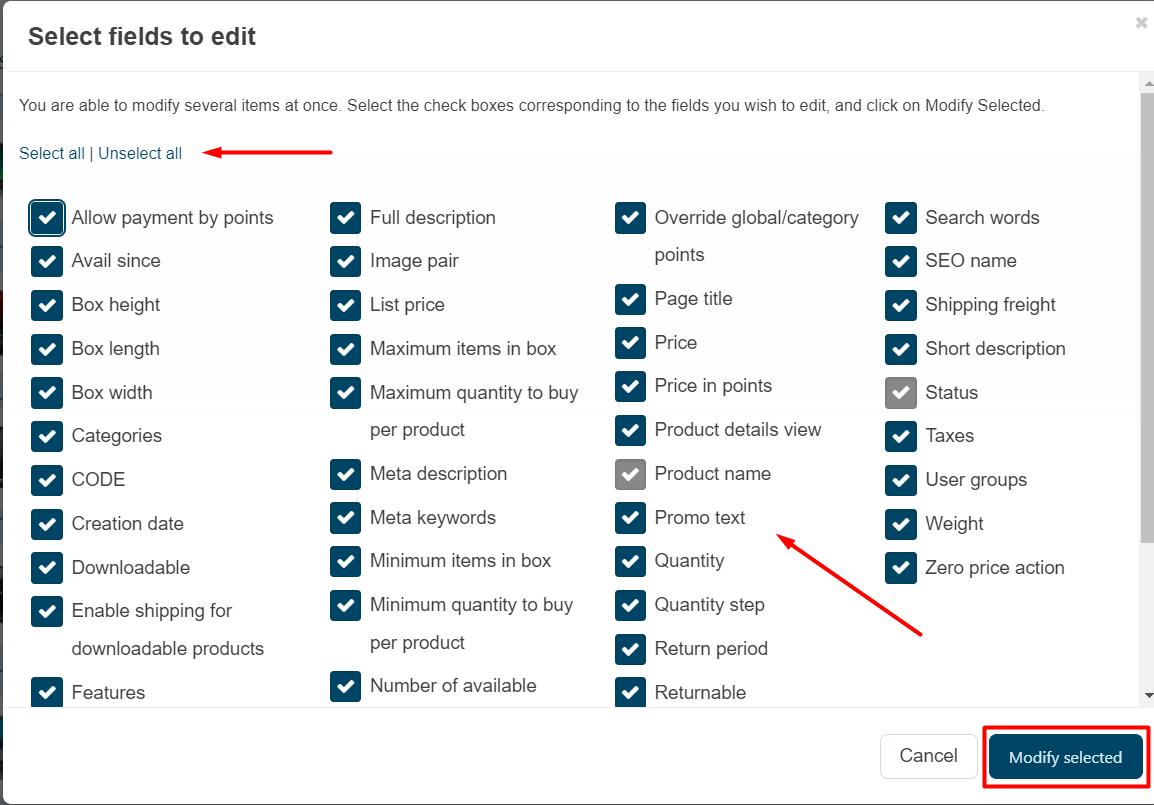
This will open a dialog box where you can choose the fields you would like to edit. Select or unselect using the checkboxes and click on the Modify selected button to save the changes.
Edit Product Information
To edit a product’s information in detail, click on the product name or code hyperlink as shown in the image below.
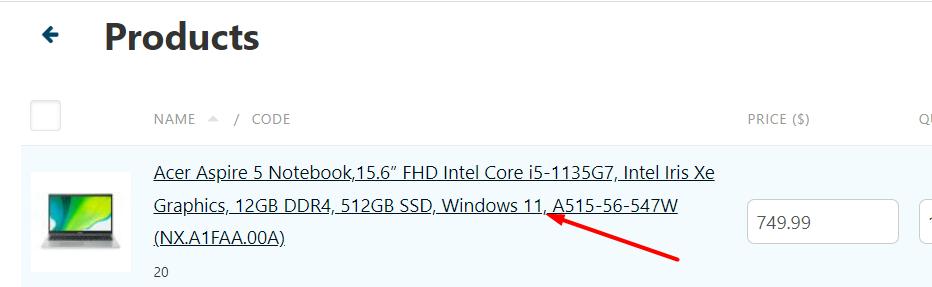
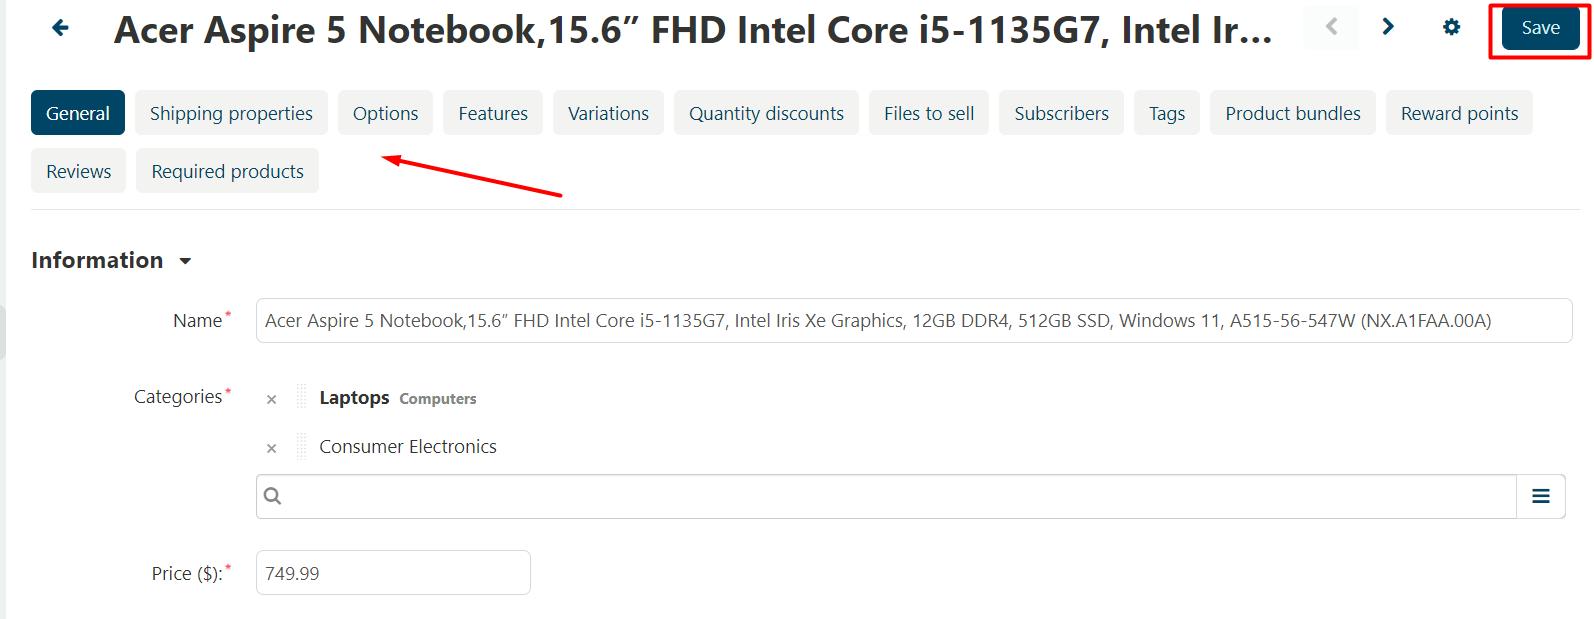
You will be redirected to the detailed product information screen with all data populated for edit.
You can modify some or all of the information as required by clicking on the tabs such as Shipping properties, Options and so on.
The process of editing is similar to adding a new product. Click here to learn more. Once the updates are done, click on the Save button to update the product information into the system.
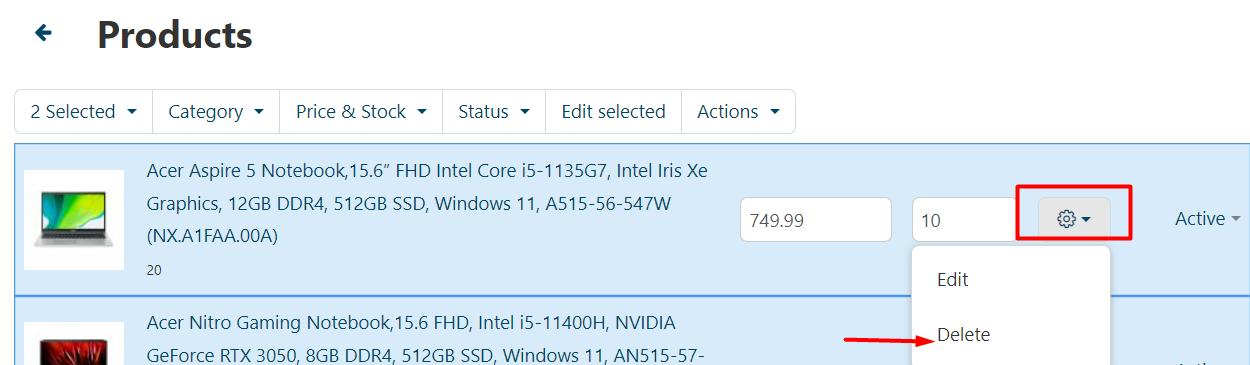
Delete Product
In order to delete a product, select the desired product from the list and click on the gear icon.
Click on the Delete option as shown below. The selected product will be deleted instantly.
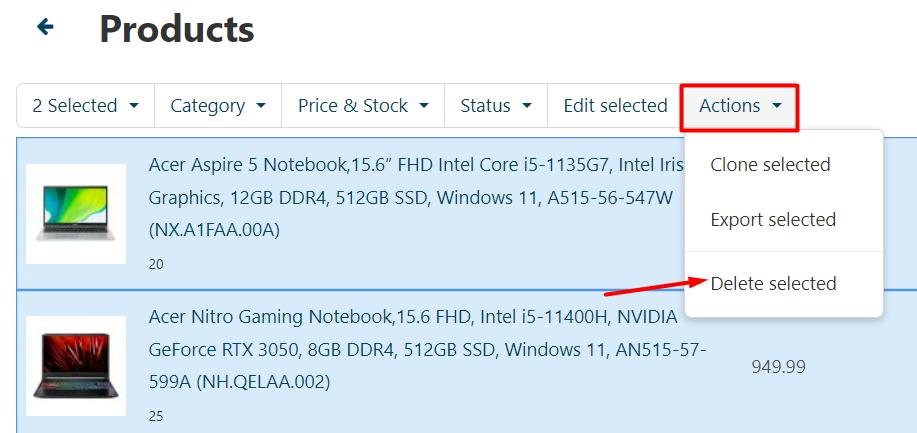
You can also delete multiple products at once by selecting the products and clicking on the Action button. Click on the Delete selected option and selected products will be removed from the system.
Export Products
In case you would like to keep the data saved for offline purposes or record keeping, then you can use the export data option available. To export the data, follow the steps below.
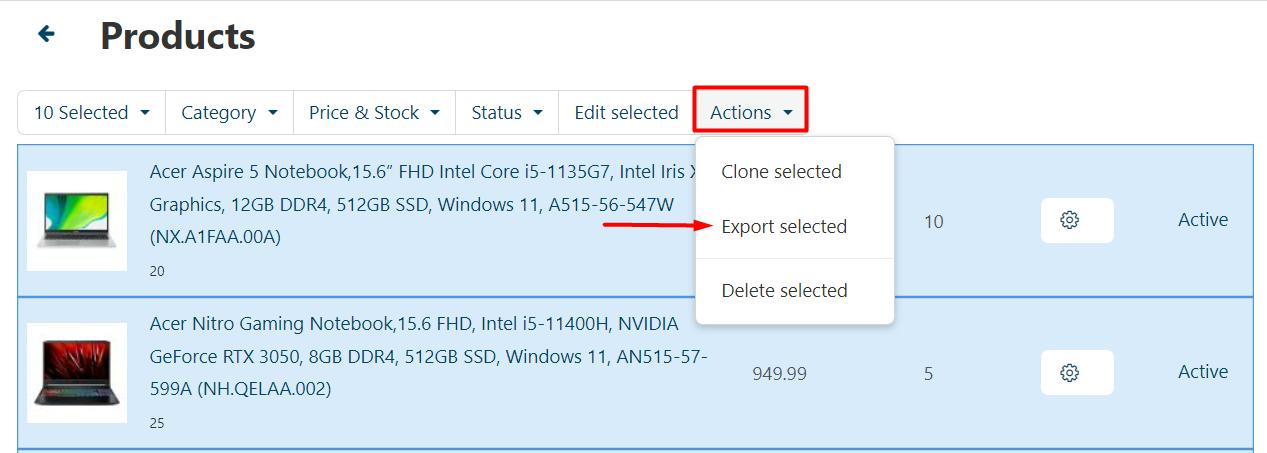
Select the product(s) to be exported and click on the Actions button.
Click on the Export selected option.
You will be redirected to the following page titled as Export data.
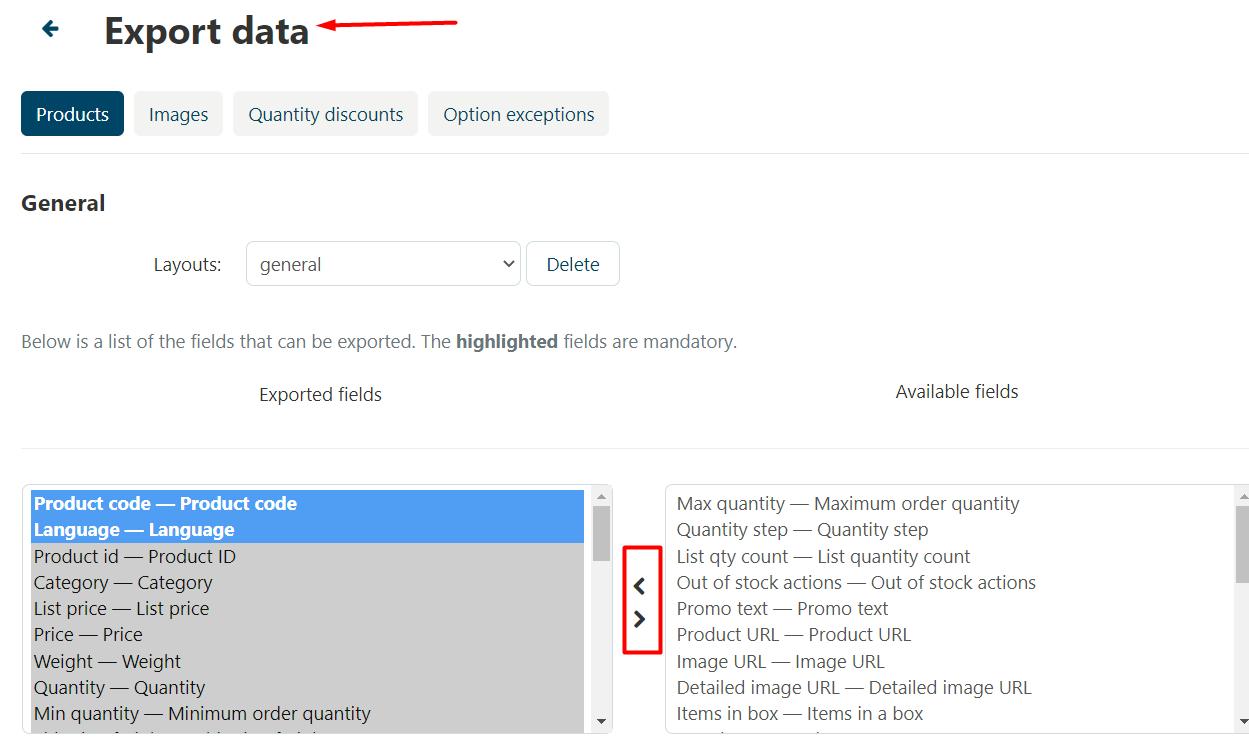
Use the < or> arrows to select the required fields for export. Next, scroll down.
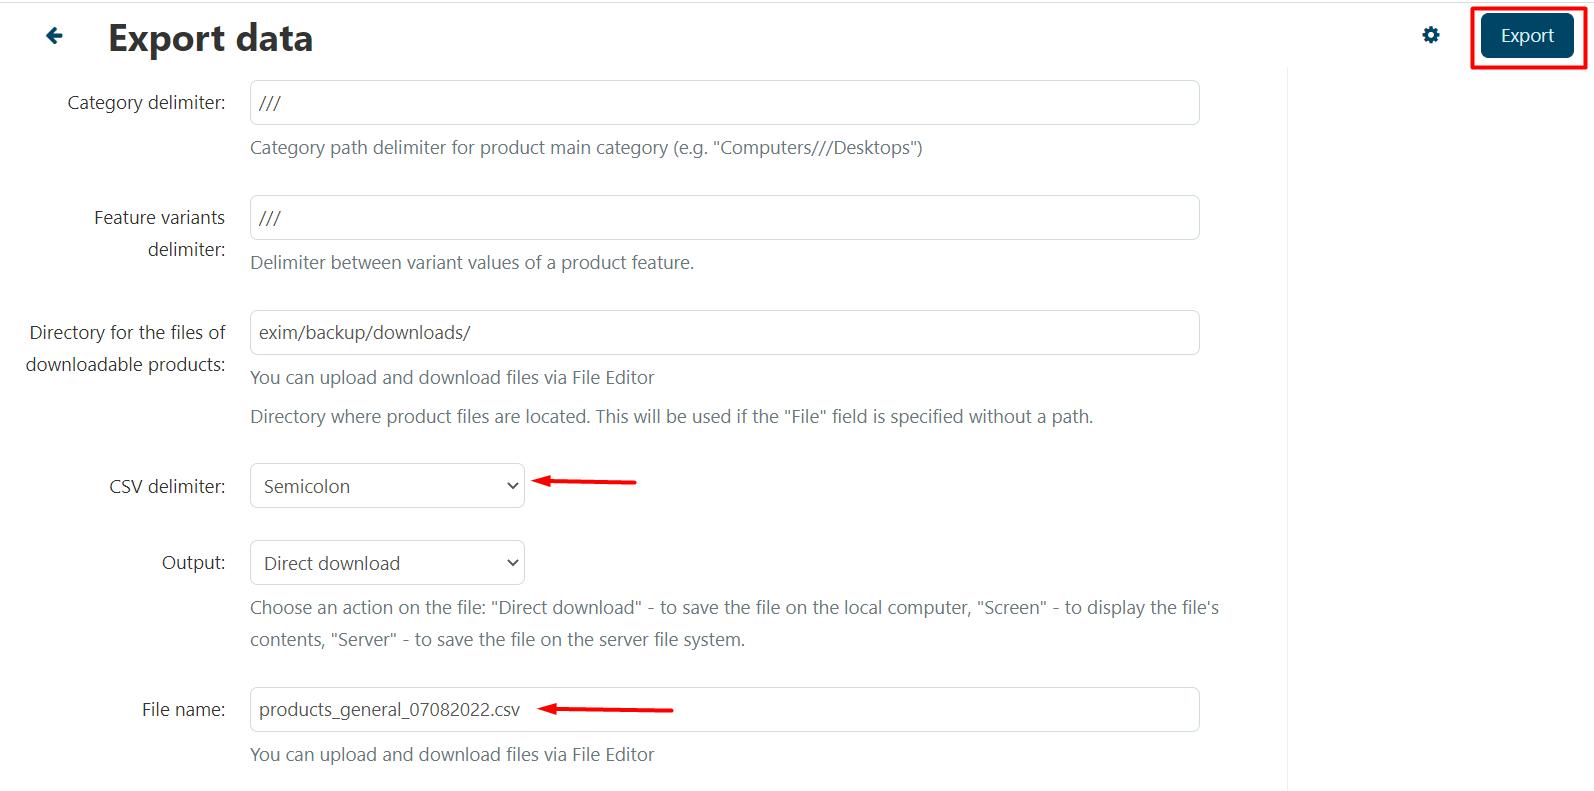
You can leave the other options unchanged. Since the file is downloaded in CSV format, you can specify the separator or CSV delimiter from the dropdown.
The file name is auto populated with current date. You can modify it as needed. Once done, click on the Export button.
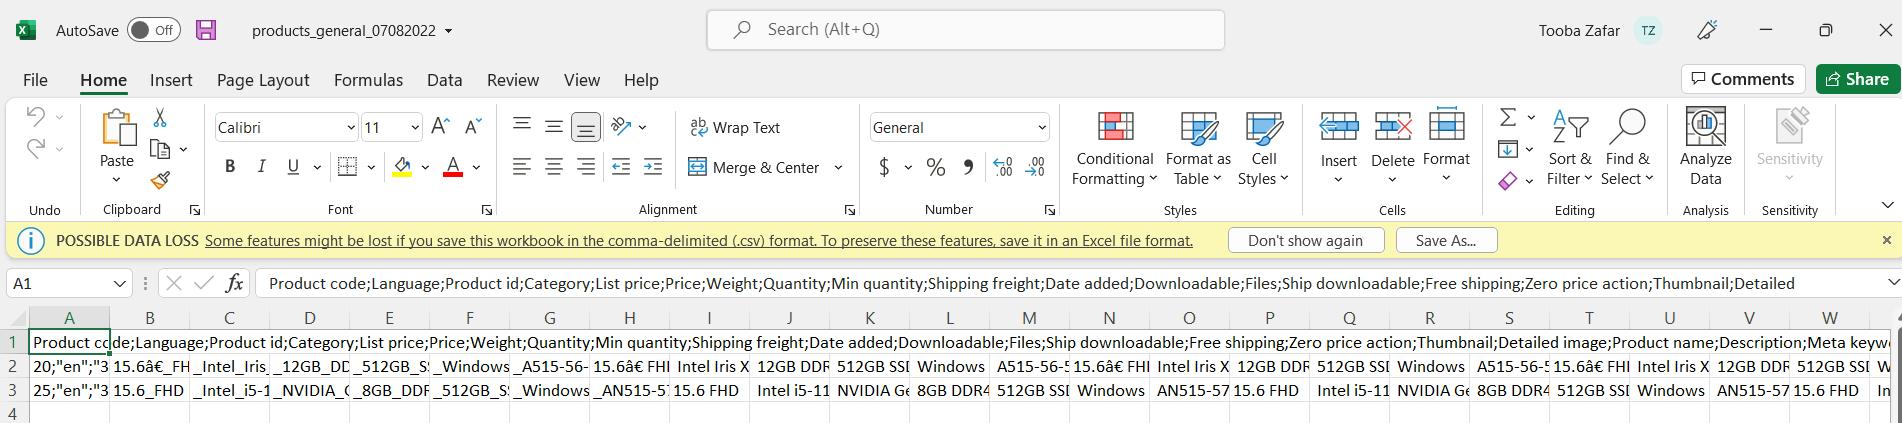
Following is the sample of the downloaded file with exported products data.
Message Center
Under the message center, there are two options: Customer Communication and Admin Communication.
Customer Communication
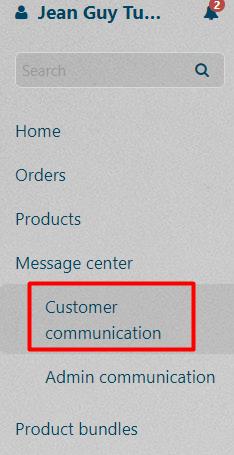
From the left menu, click on the Message center option.
Click on the Customer communication.
On this page, you can read customers’ messages including questions related to specific product.
This is how the list of all messages will appear identified by Thread ID.
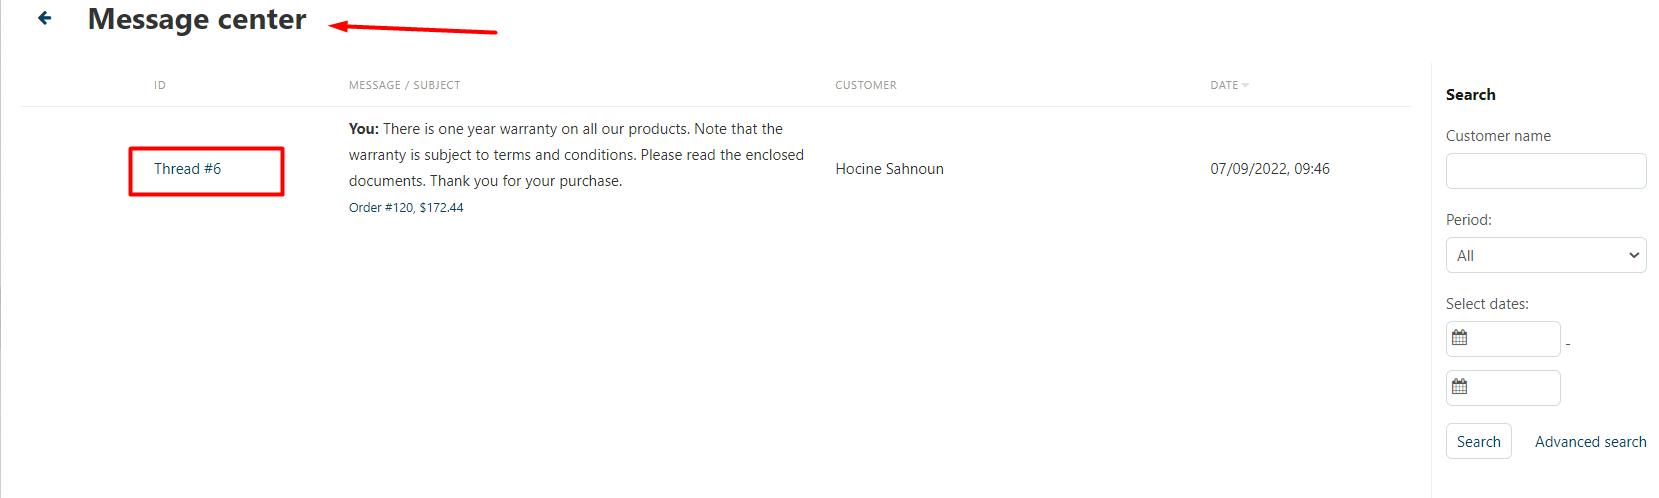
To view the detail of the message and respond, click on the Thread ID number.
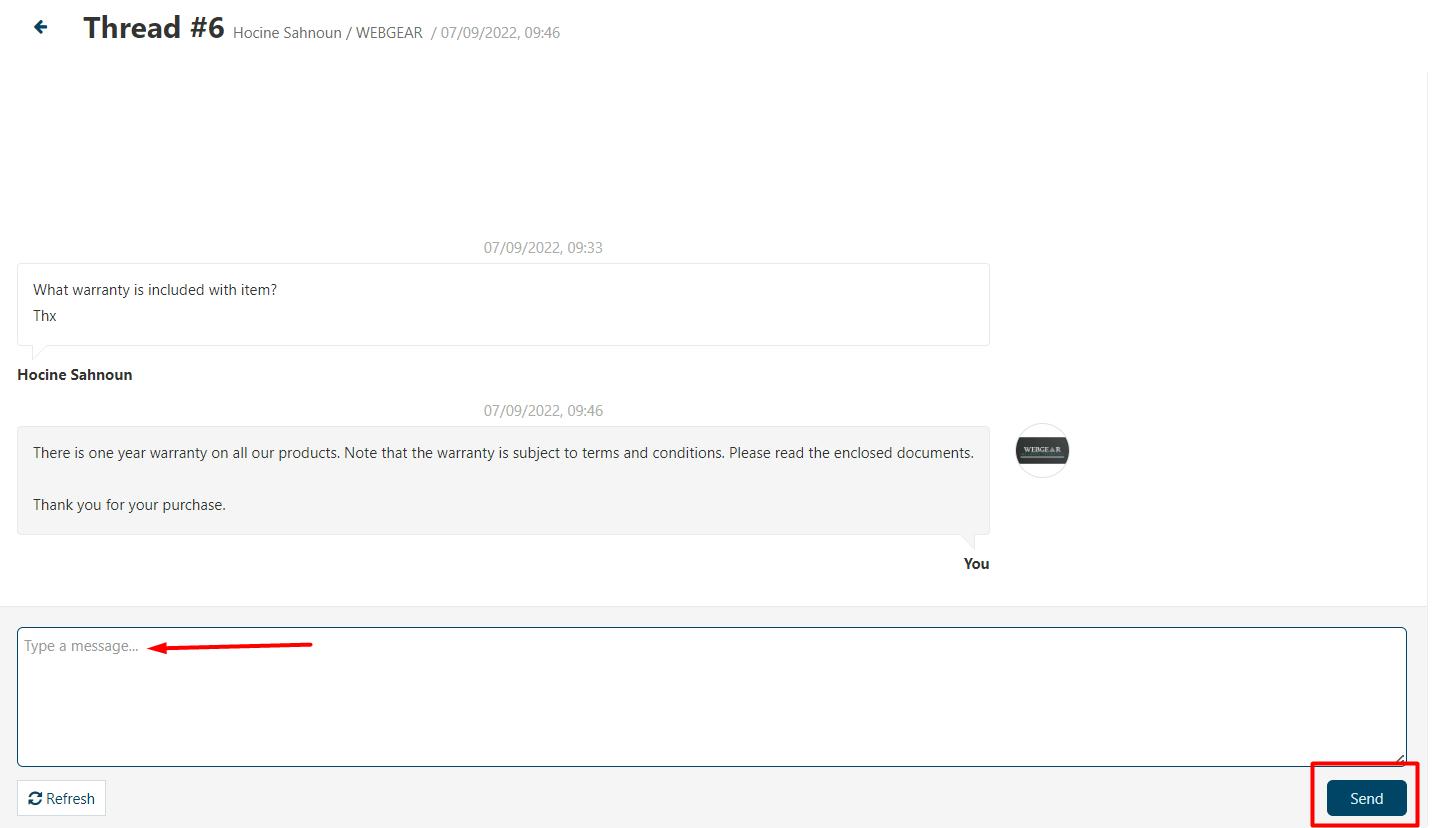
System will display the message contents. Type your response and click on the Send button.
Admin Communication
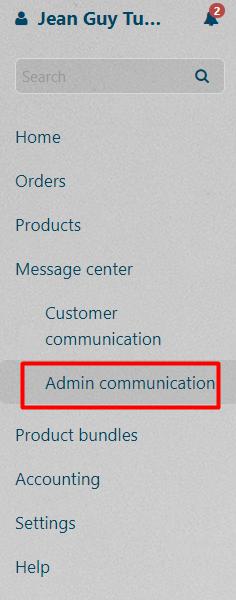
From the left menu, click on the Message center option.
Click on the Admin communication.
On this page, you can read messages related to following:
the vendor has a question to the administrator; the admin has any comments or suggestions on how the product in the vendor’s store should be filled, and he wants to show him what needs to be fixed; the marketplace owner wants to tell his vendors some important news.
This is how the list of all messages will appear identified by Thread ID.
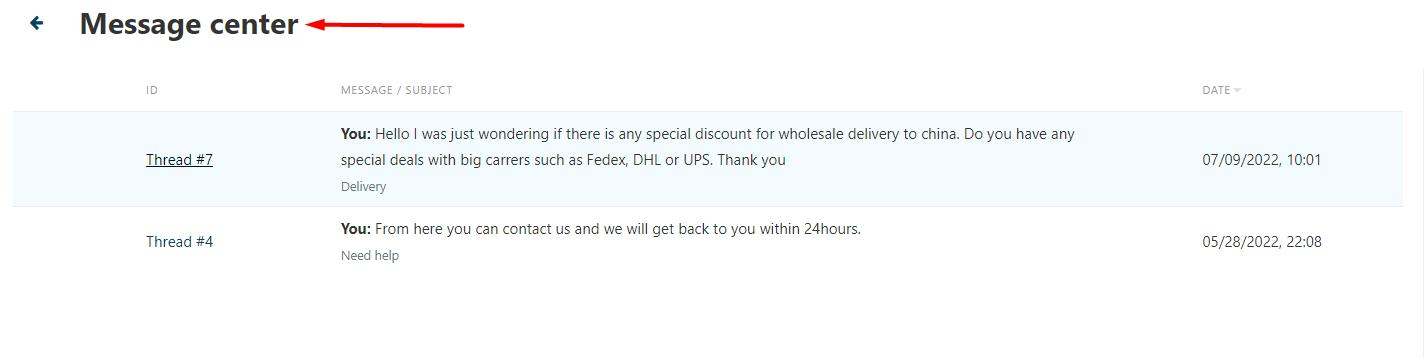
The procedure of responding remains same as that of sending messages to the customers.
Contact Administrator via Message Center
There are two ways to contact administrators (via messages). One is from Message Center and second is from the Dashboard.
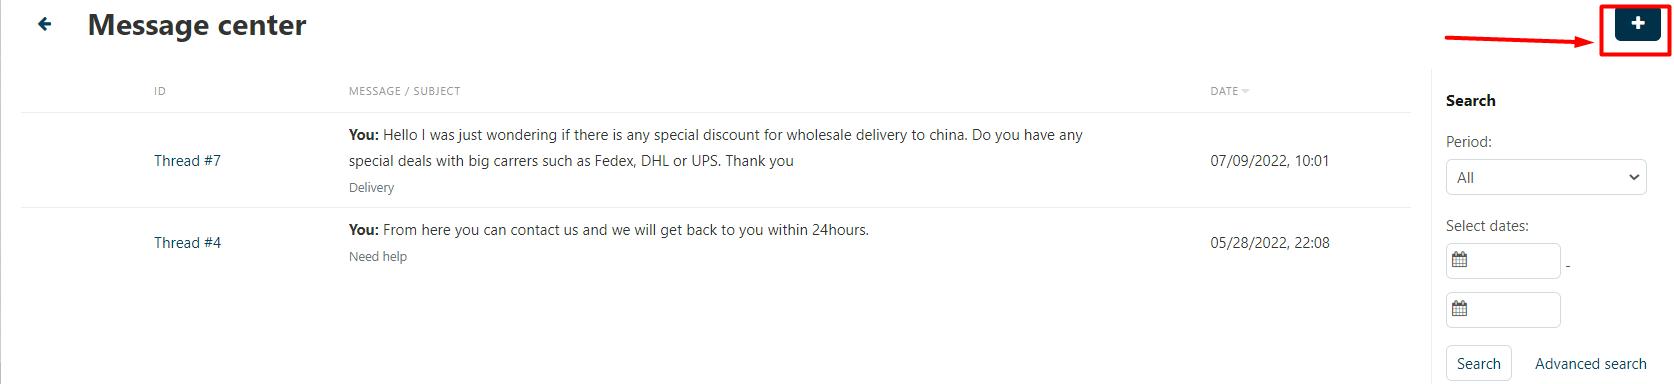
From the message center, click on the + icon available at the top bar.
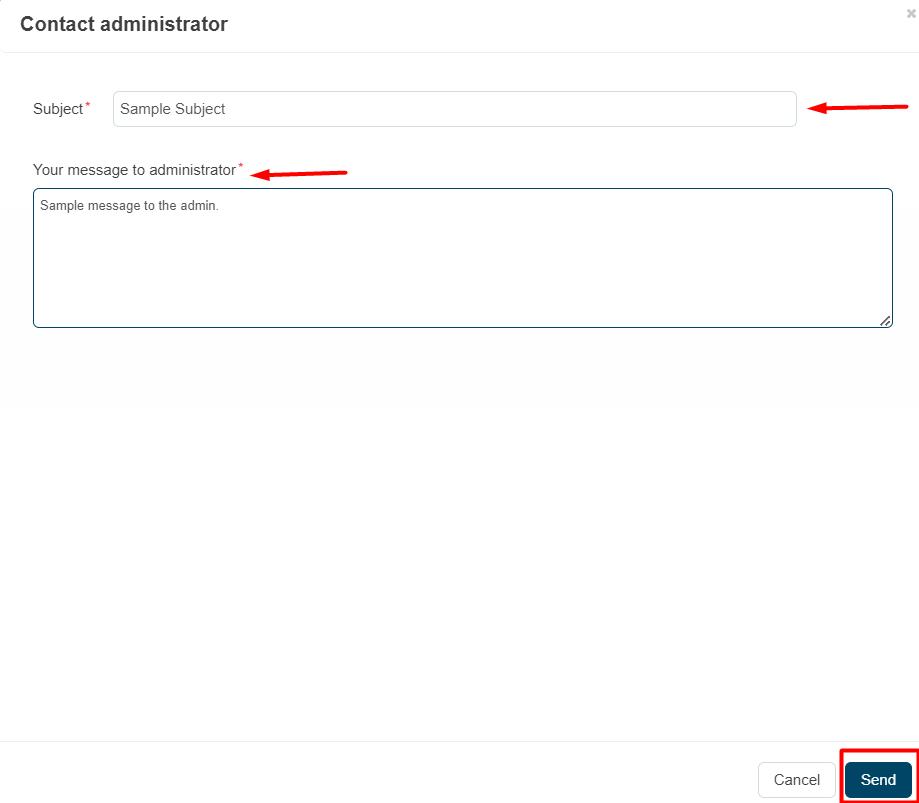
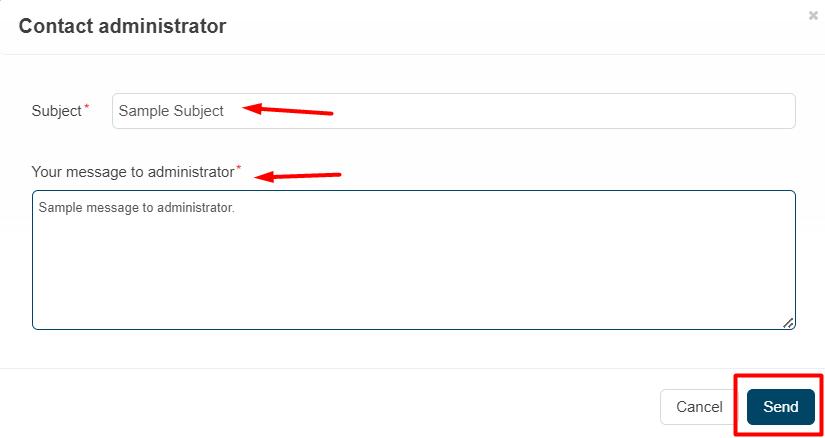
A dialog box will open as shown below. Enter the subject and message in the textboxes and click on the Send button.
Contact Administrator via Dashboard
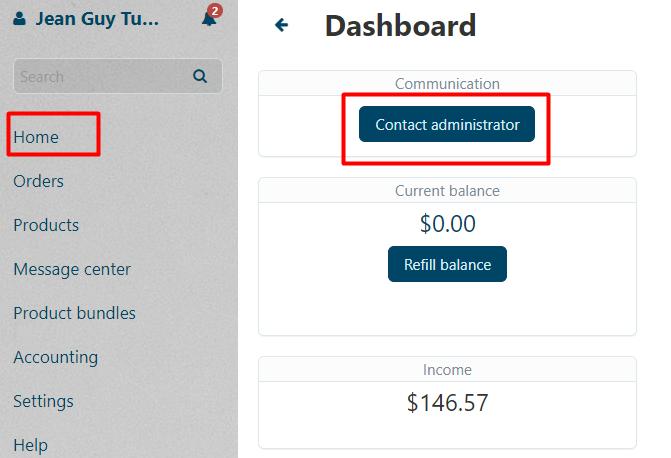
Alternatively, you can send a message directly from the dashboard. Click on the Home from the left menu and click on the Contact administrator button.
A dialog box will open as shown below. Enter the subject and message in the textboxes and click on the Send button.
Product Bundles
In this section, you will learn about managing product bundles.
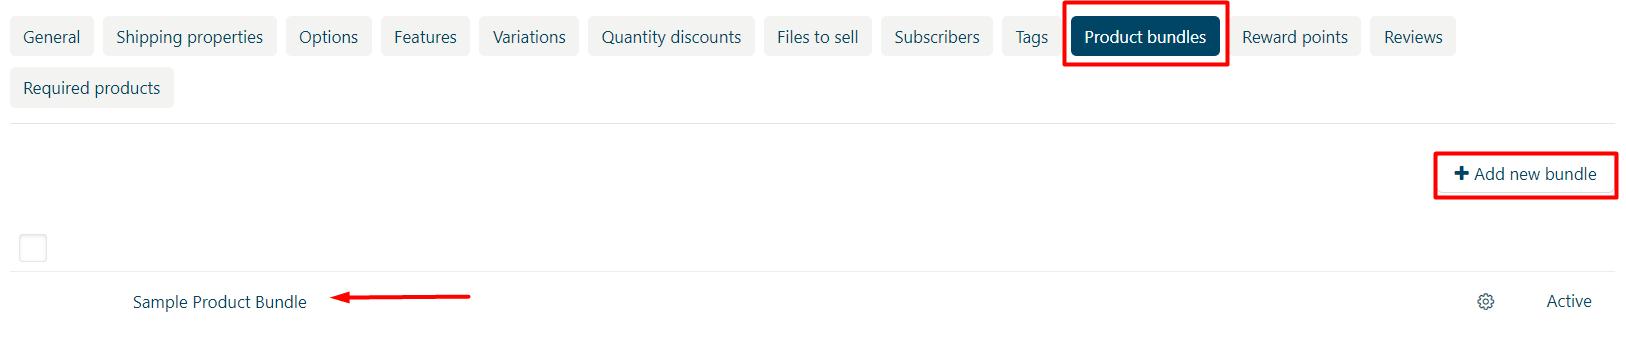
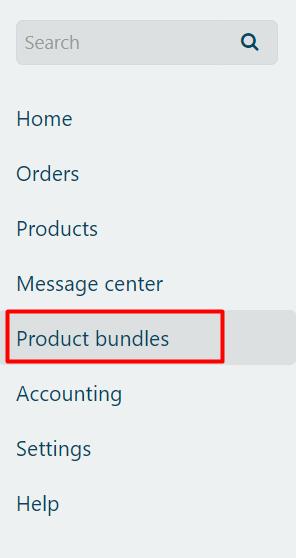
From the left menu, click on the Product bundles option.
Add New Product Bundle
To add a new bundle, click on the ![]() available at the top-right side of the webpage.
available at the top-right side of the webpage.
A dialog box will open with the list of input fields. Read below for more detail.
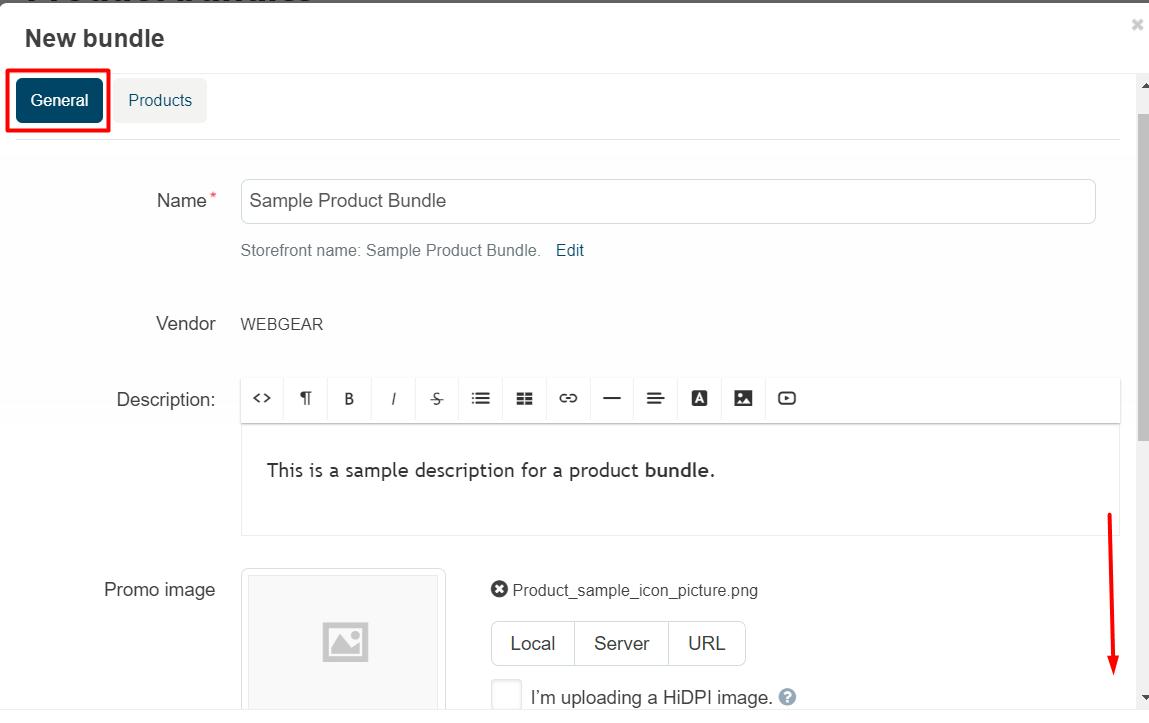
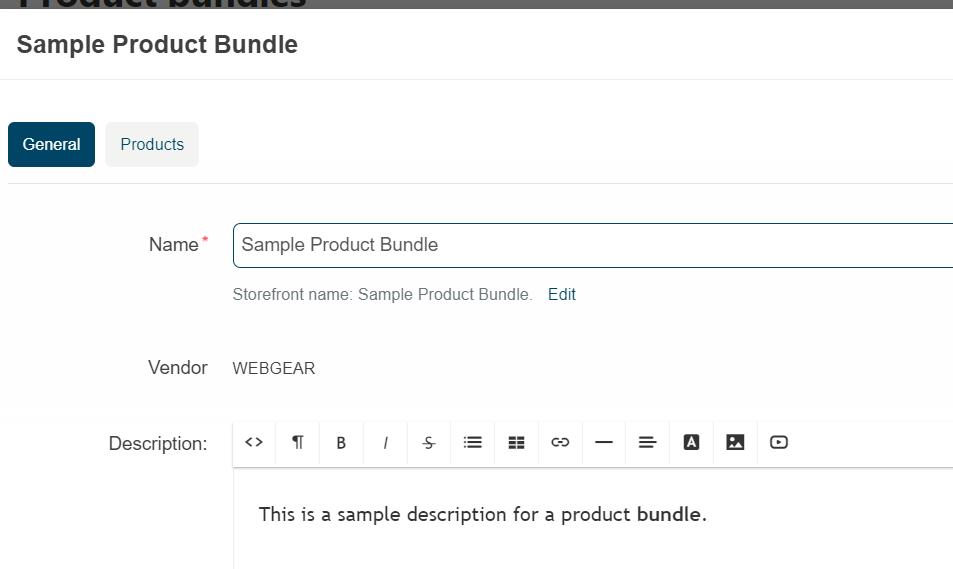
- General: By default, the first tab to enter General information is selected.
- Name: Enter the name of your product bundle in the textbox.
- Vendor: It is selected by default (WEBGEAR in our example) and is not editable.
- Description: Use the rich textbox to add description of your product bundle.
- Promo Image: There are three ways to upload icon or any promo image: Local (by selecting file from your computer folder), Server (select image from file browser) or URL (where you enter complete URL of the image).
Scroll down for more information to be entered.
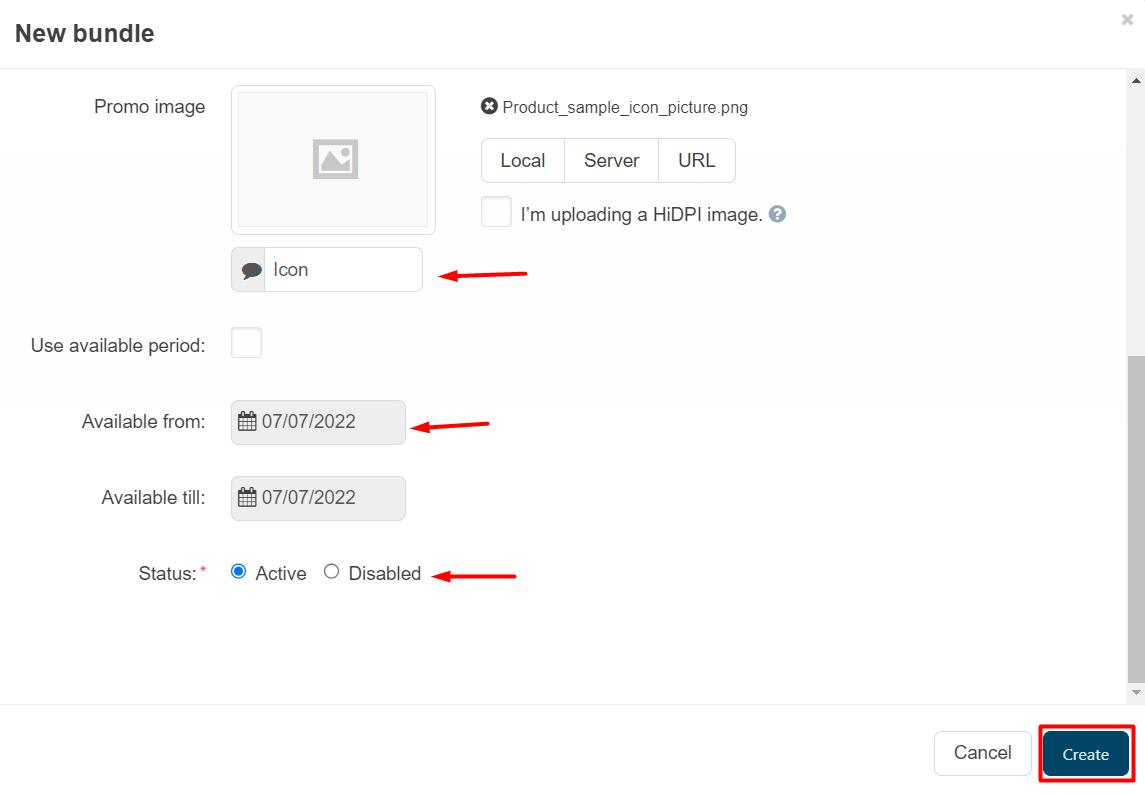
- Alt text for image: In case the image fails to appear to the user, it is useful to enter alternate text. Add the desired text into the textbox

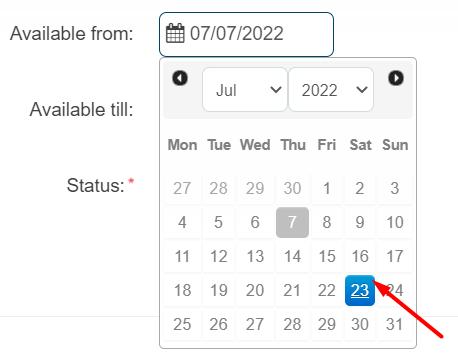
- Available From/till: If the product bundle is required to be applicable for a specified duration, then click the use available period checkbox. Once checked, the fields for Available from and till will be enabled. Select the date from the calendar picker. Use same method to select date for Available till.
- Status: By default, Active status is selected. You can also select Disabled if required.
Next step is to add products.
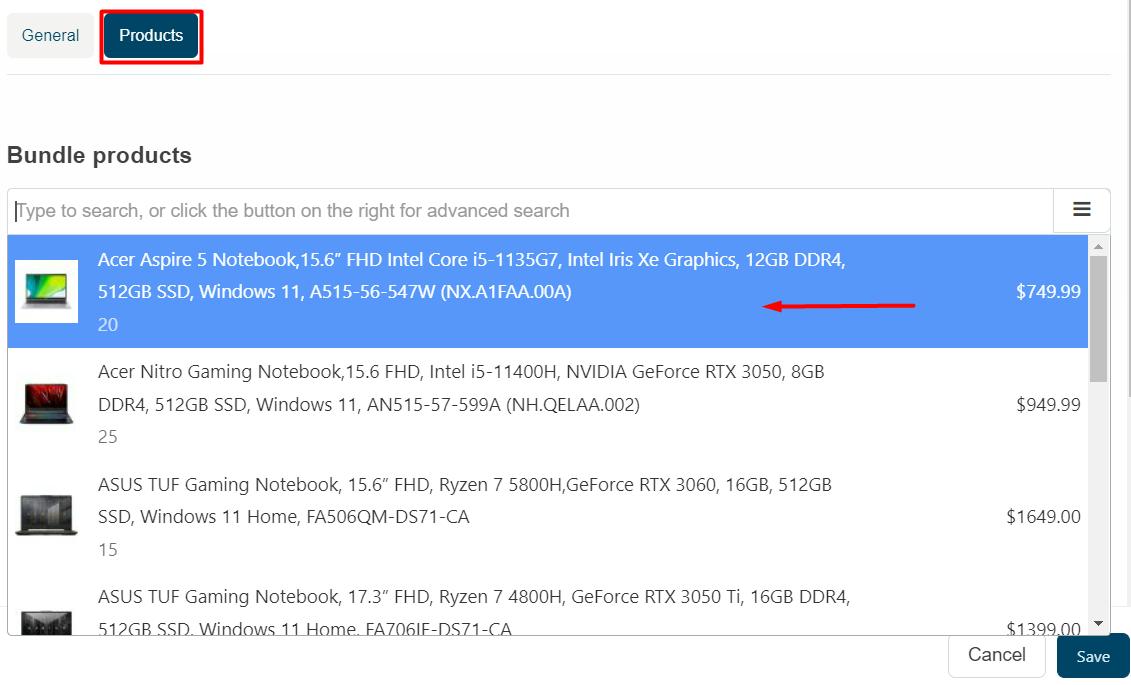
Click on the tab for Products as shown below and search for the desired product(s) to be added in the bundle.
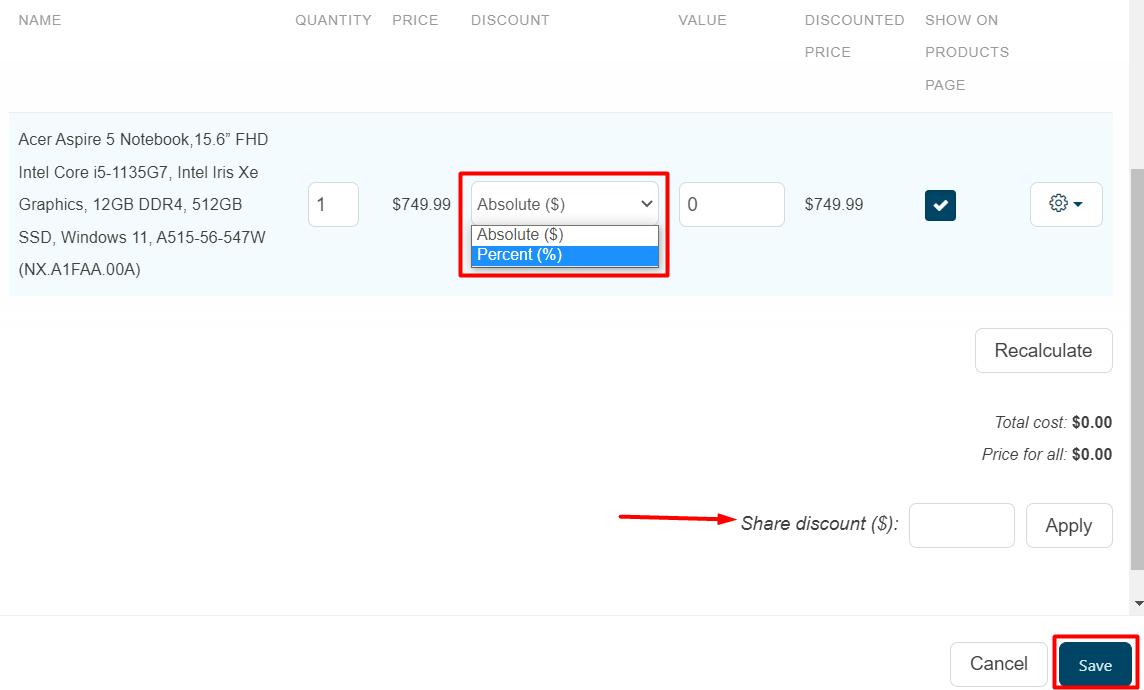
Once the product is added, you can modify the Quantity, Discount & Value. Click on the Save button.
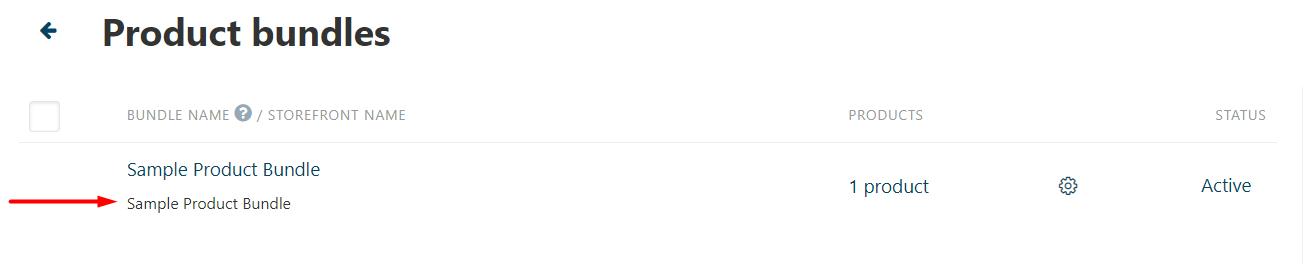
The added product bundle will appear in the list as shown below.
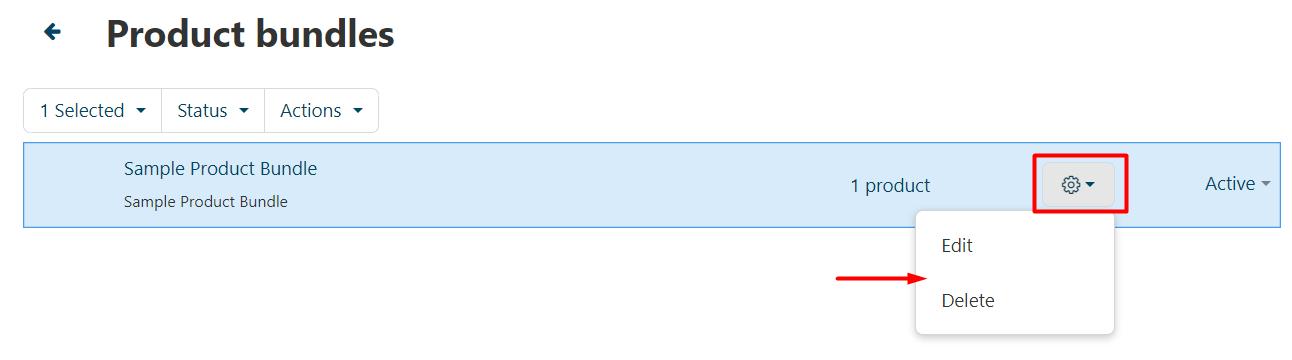
Edit or Delete Product Bundle
Select the bundle from the list to be deleted or edited and click on the gear icon as shown below.
To edit the details of the product bundle, click on the Edit.
Editing is similar to adding a new record with values being auto populated. Modify the details and save to update the changes.
To delete a record, you can either delete in bulk by selecting the Action button at the top or delete record individually.
Bulk Delete:
Select the bundle(s) from the list and click on the ActionsDelete Selected option.

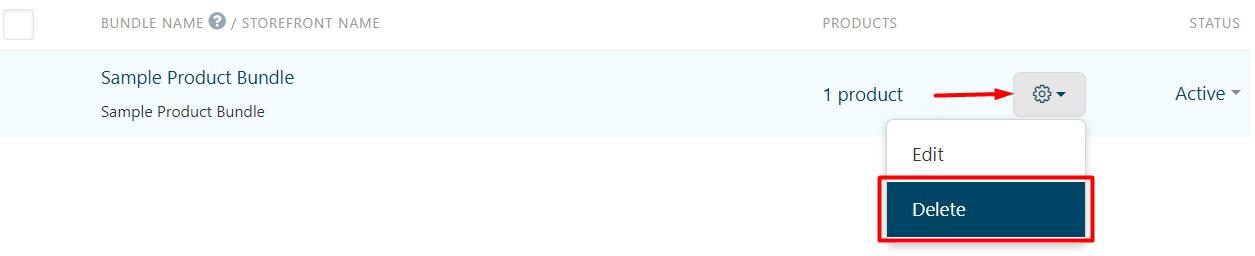
Individual Delete:
Click on the gear icon and select the option for Delete.
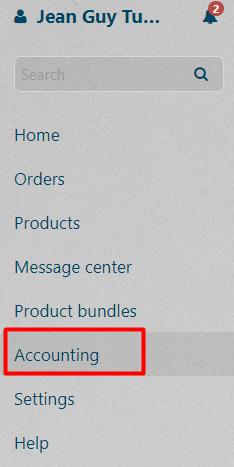
Accounting
In this section, you will learn about Accounting.
It helps marketplace owners and vendors to keep track of their income and transactions. To access that page, click on the Accounting menu.
By default, Transactions tab is selected.
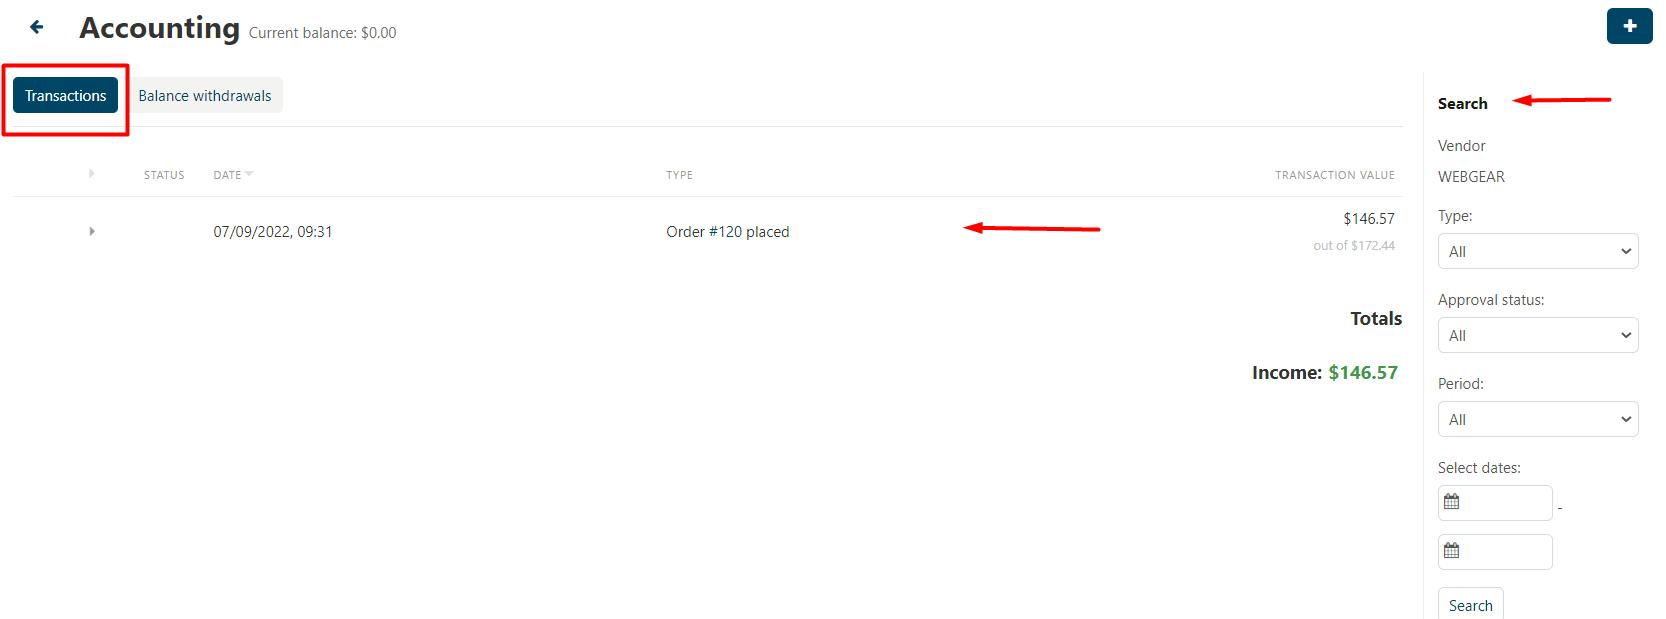
Following information is available on the list.
- Status— the status of the transaction; it applies only to payouts and withdrawals.
- Date— the date and time when the transaction appeared on the list.
- Type— the type of the transaction.
- Transaction value— a positive value means that the money was received during this transaction; a negative value means that the money was spent.
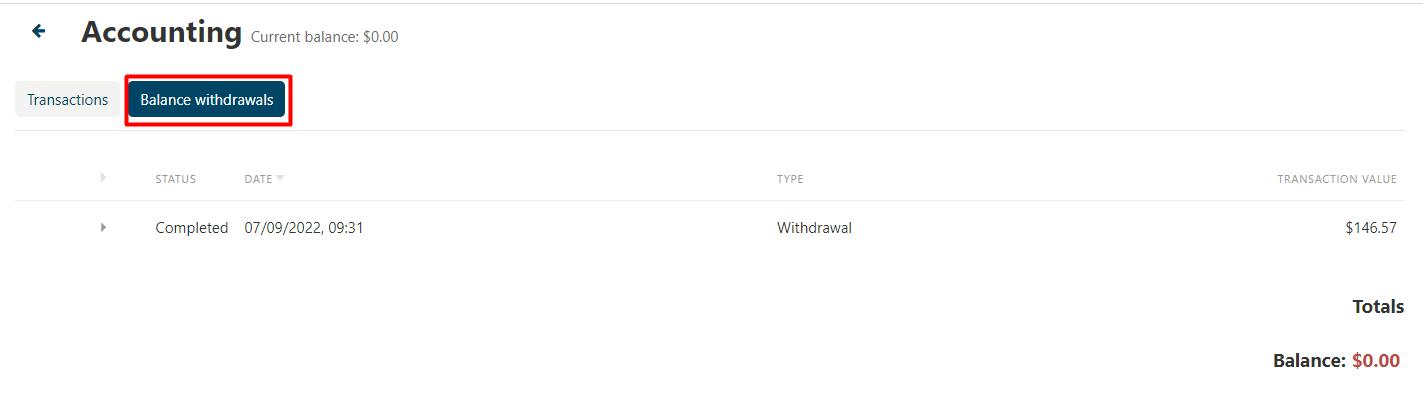
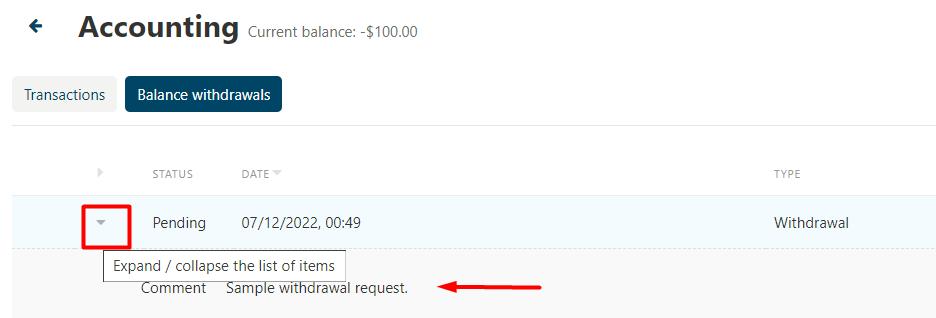
The second tab lists down the Balance withdrawals.
You can also create a new withdrawal by clicking on the + icon available at the top. A dialog box will appear as shown below.
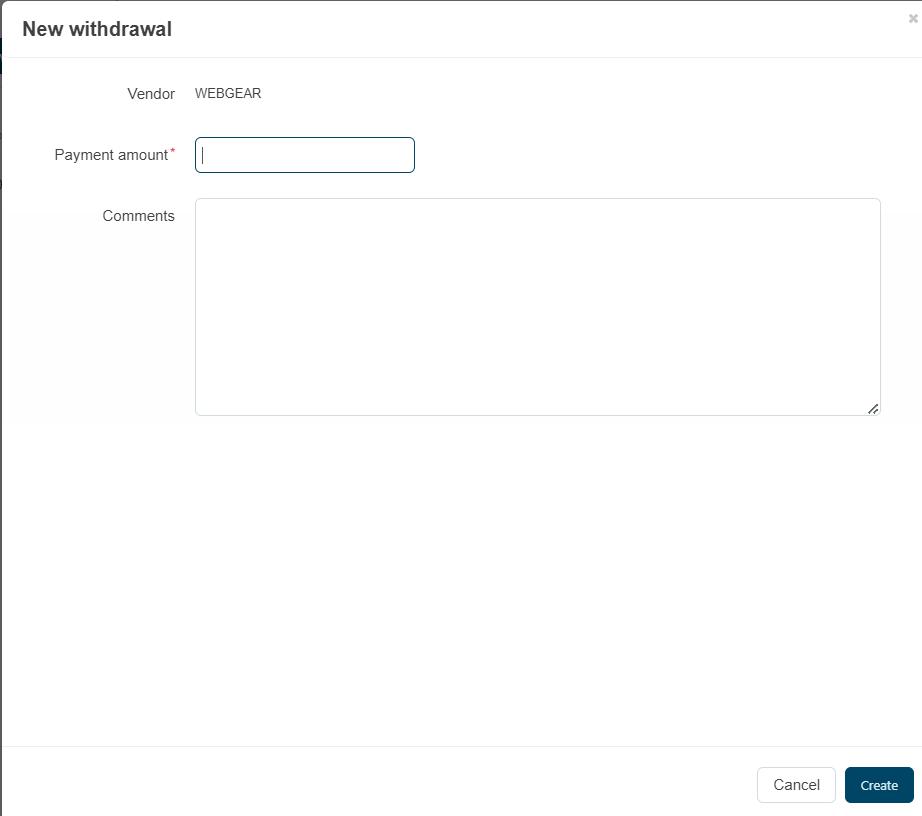
Enter the following details:
- Select a vendor to request money from.
- Specify the amount of money in the primary currency of your marketplace.
- Enter a commentary, if necessary.
Click on the Create button and the new request will appear on the list as shown below.
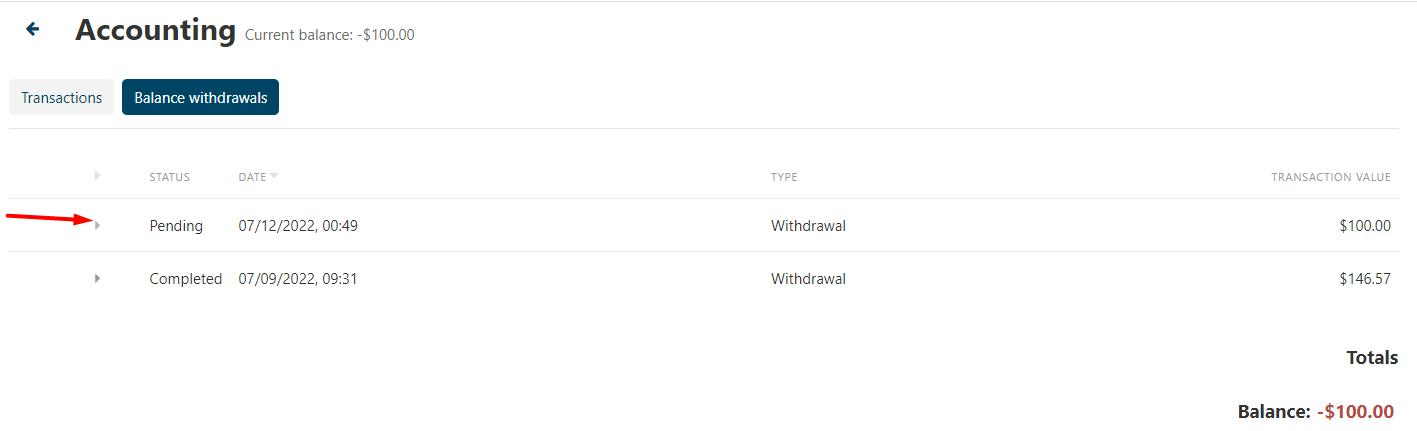
You can also click on the arrow to expand the list of items and view additional information such as comments.
Settings
In this section, you will learn about different options available under the Settings menu.
From the left menu, click on the Settings option.
Three sub-menus appear under the Settings. Read below for more details on each of the sub-menu.
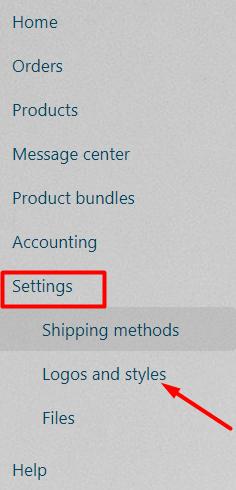
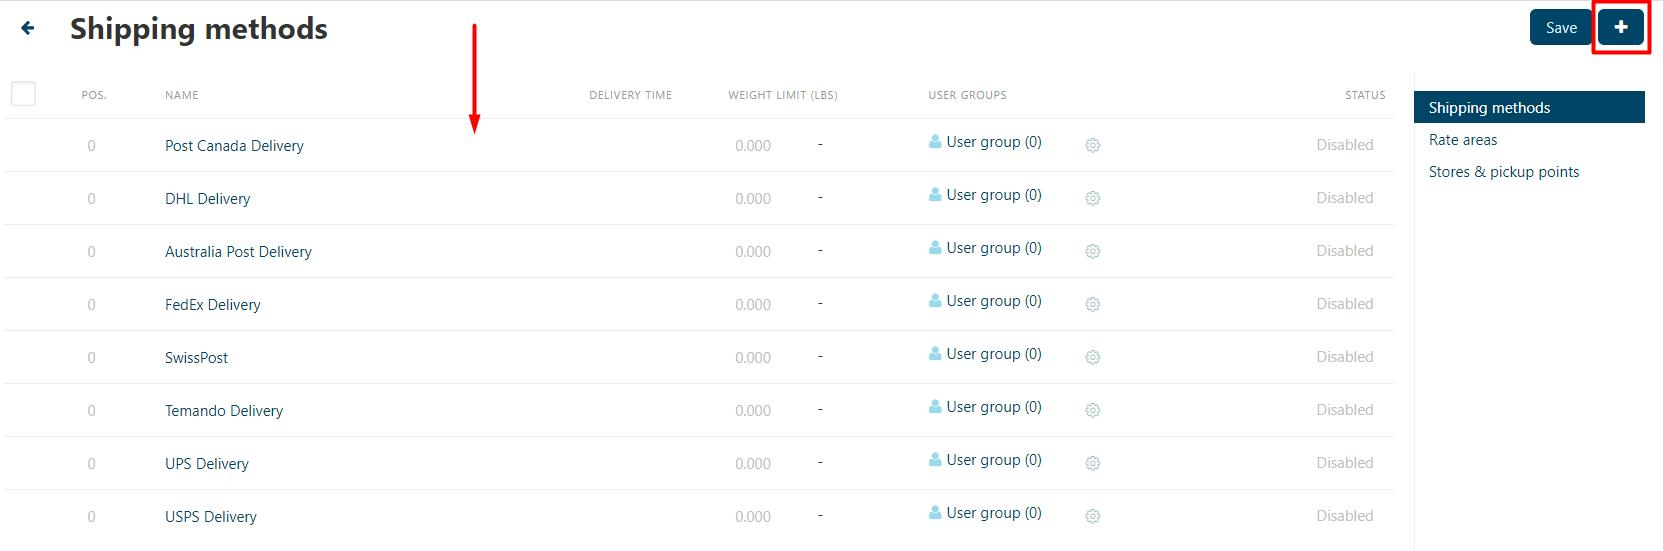
Shipping Methods
You can either select shipping method from the list or add a new shipping method by clicking on the + icon as shown in the image below.
You will be entering following data while adding a new shipping method.
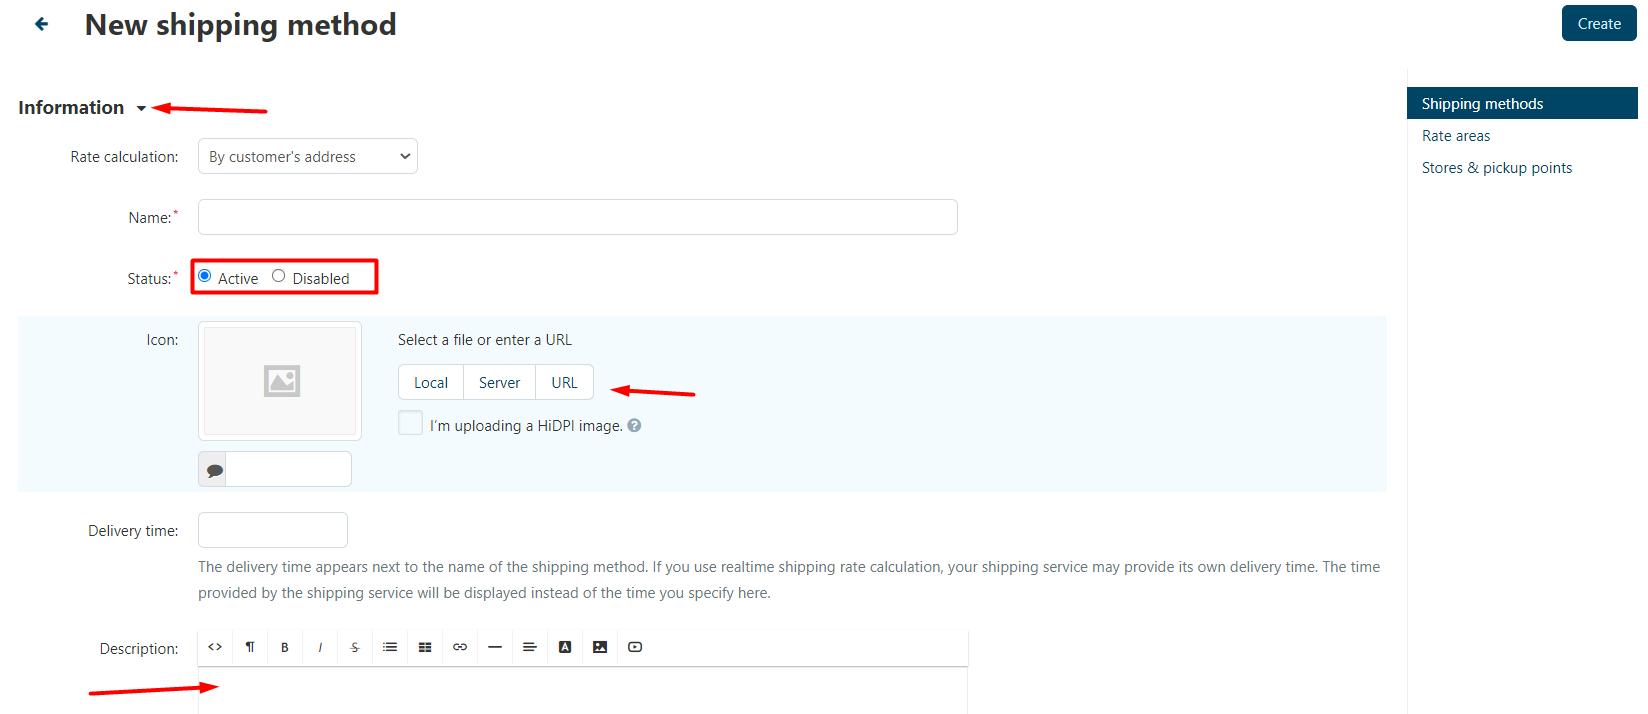
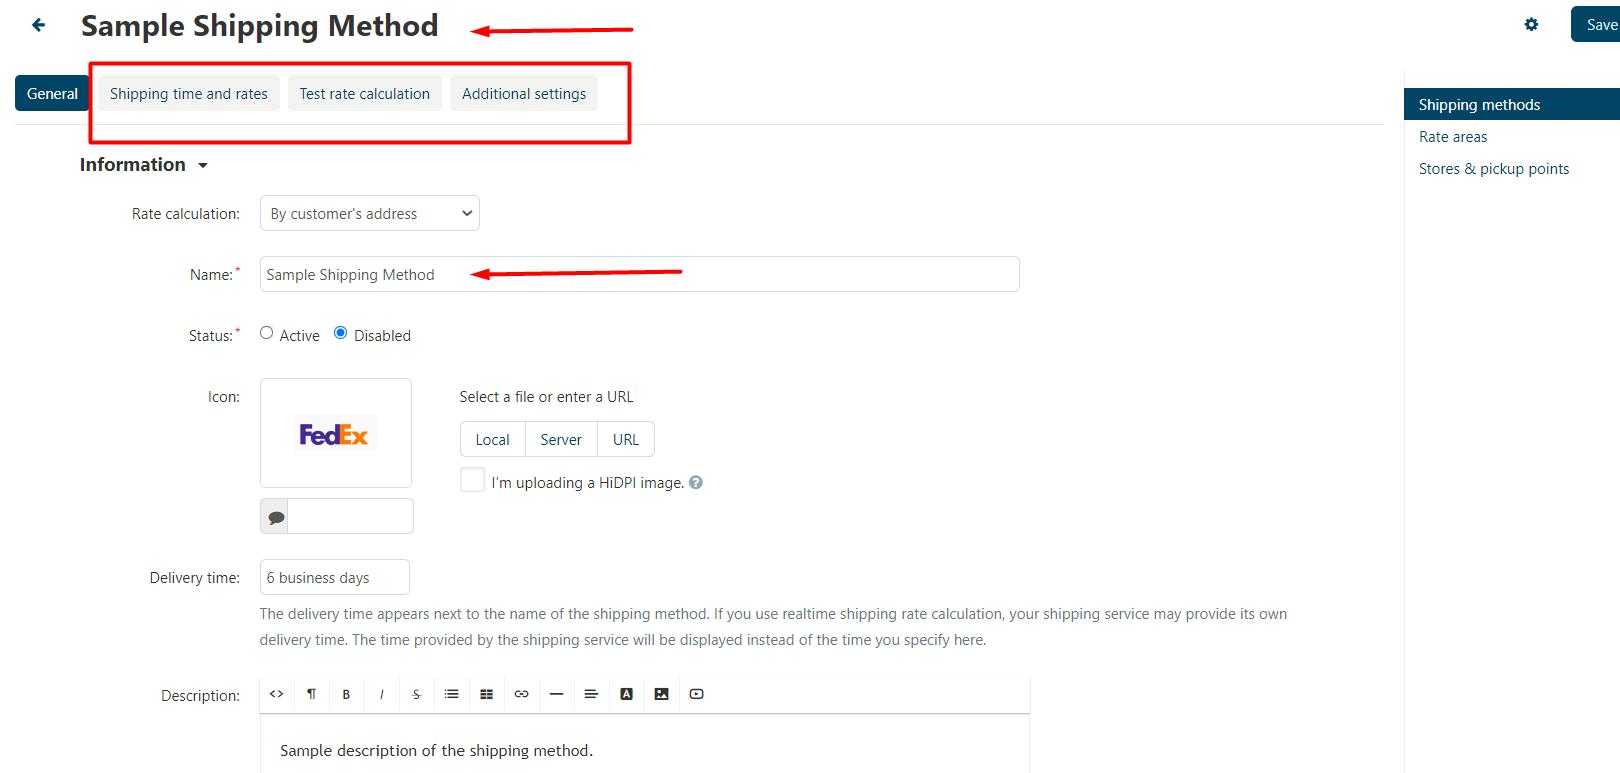
Information
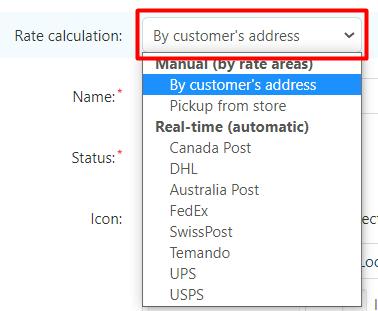
- Rate calculation— the way how the shipping cost will be calculated. When you select this dropdown, following is the list of information available to choose from:
- Name— the name of the shipping method as it appears on the storefront such as FedEx, DHL.
- Status— the status of the shipping method: Active or Disabled.
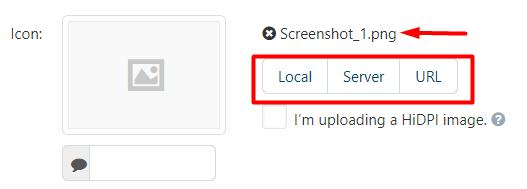
- Icon— an image to represent the shipping method. You can upload an icon from your computer, find it on the server, or provide a URL to the image. Images must be of one of the following formats only: JPEG, GIF, PNG. The maximum size should not exceed 2 MB.
- Delivery time— the time it takes to deliver an order. This info is displayed on the storefront, so that customers can decide if the delivery time meets their requirements.
- Description— detailed description of the shipping method.
Scroll down below to fill the data regarding availability.
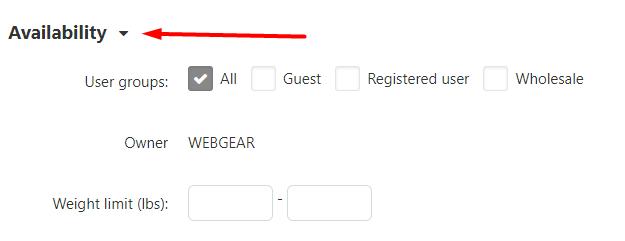
- User groups— the members of which will be able choose this shipping method at checkout.
- Weight limit (lbs)— the minimum and maximum weight of the order that can be delivered via this method. If an order doesn’t meet the weight requirements, then this shipping method won’t be offered to the customer.
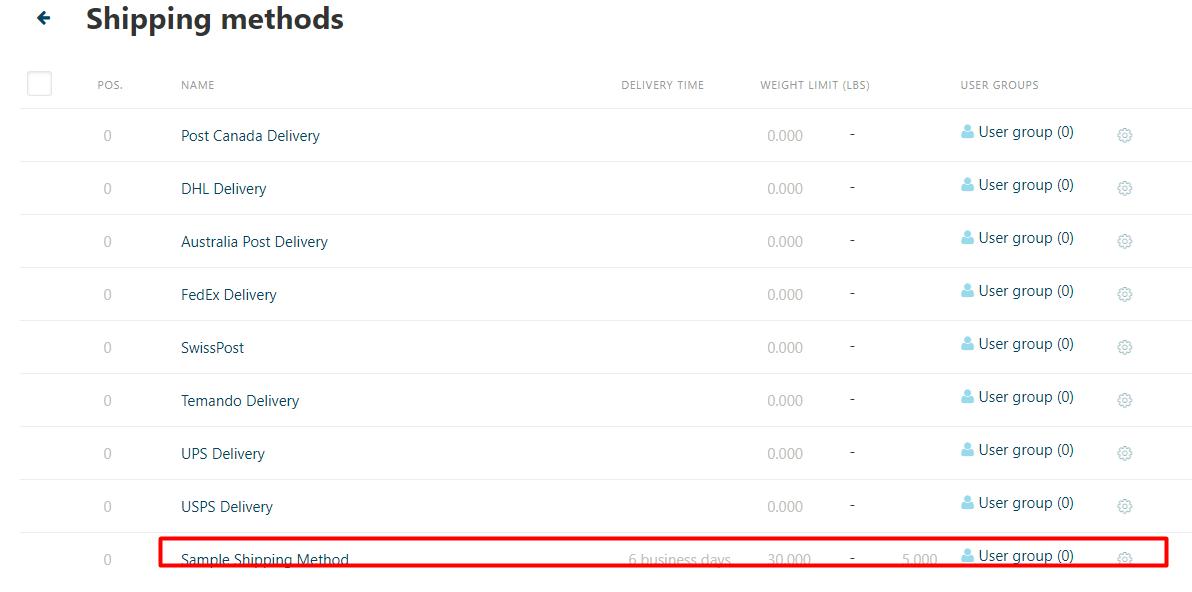
Click on the Create button available at the top and your new shipping method will be added as shown below.
Shipping time and rates
Second tab is to define the shipping time and rates. Select the from the list as shown below.
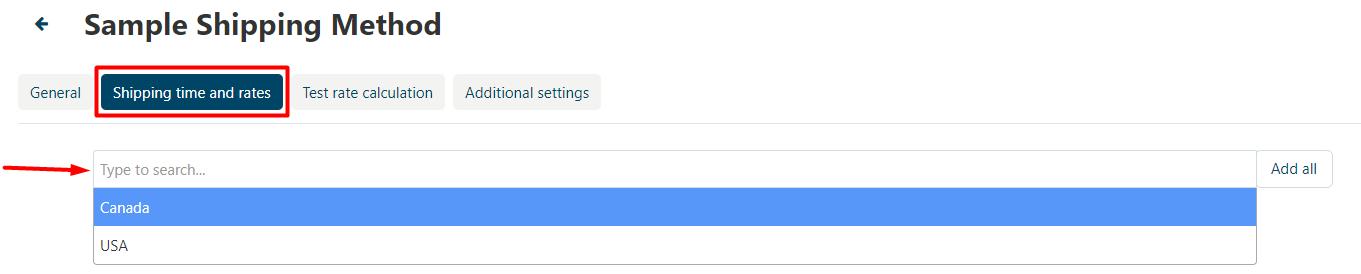
In our example, we have selected Canada from the list. You can enter the shipping time and rate in the textboxes.
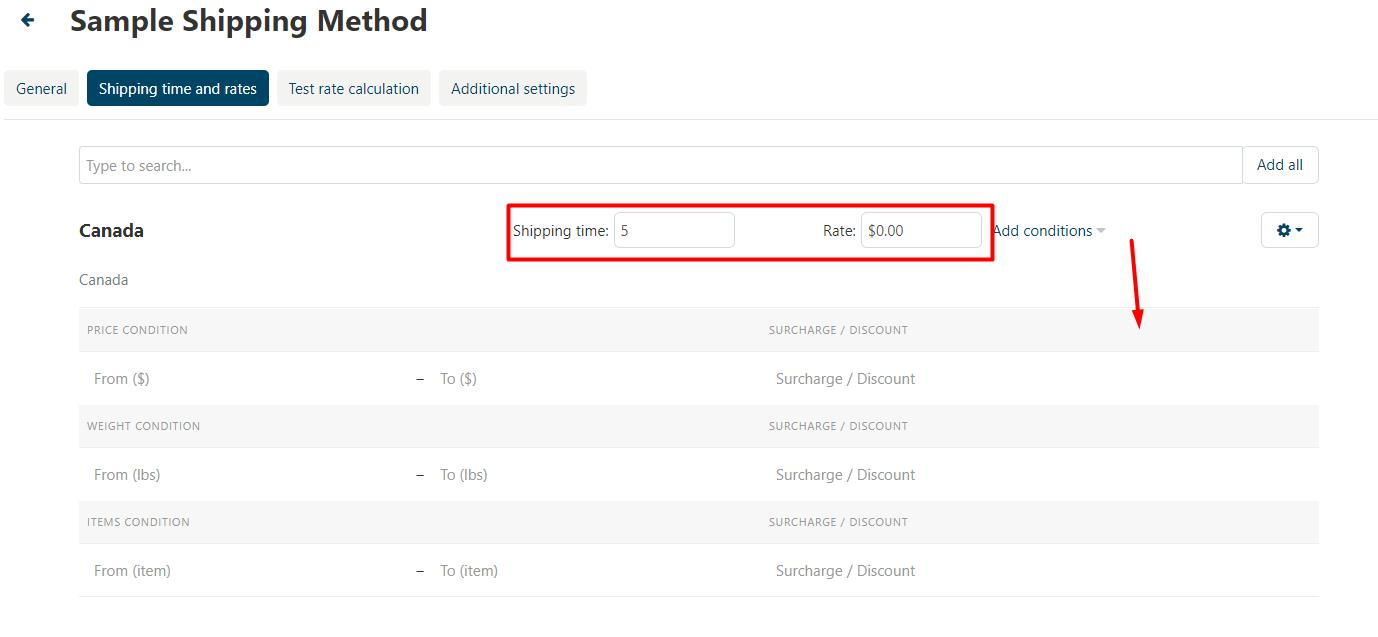
You can also specify certain conditions by clicking on the Add conditions hyperlink.
- From— the minimum value starting from which the specified surcharge/discount is applied.
- To— the maximum value up to which the specified surcharge/discount is applied.
- Surcharge / discount — the amount of money that will be added to the base Rate or reduced from it.

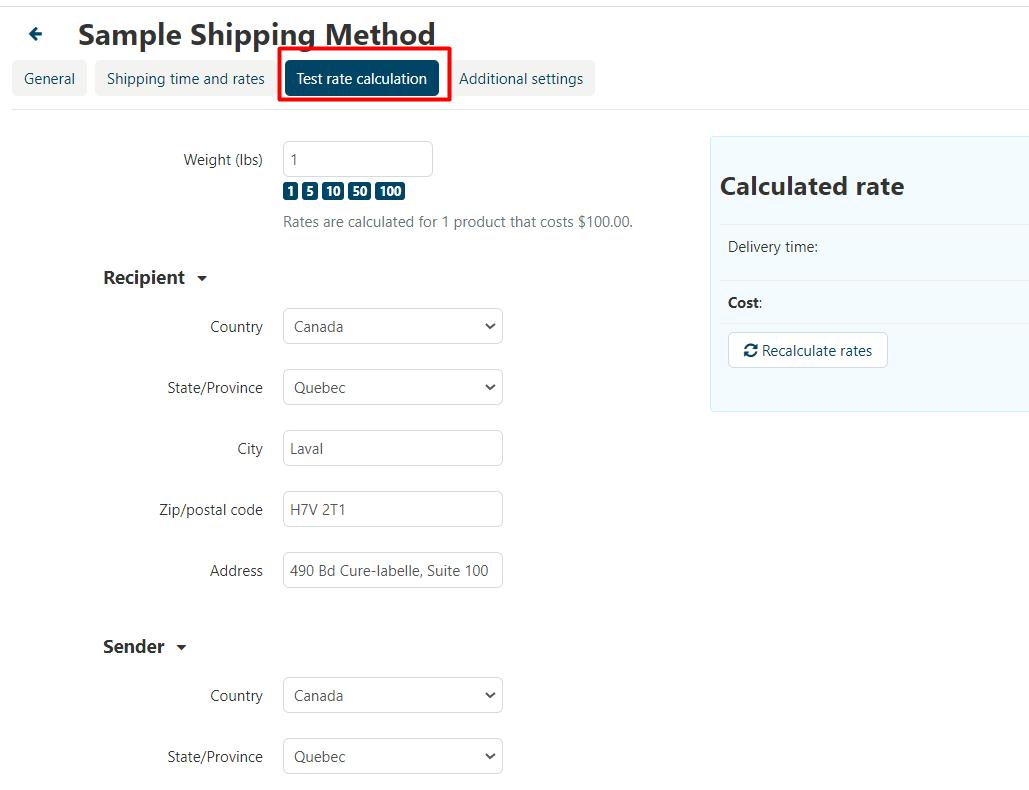
Test rate calculation
Click the Recalculate rates button to find out the shipping cost. The calculation considers the weight that you specify in the form, as well as the company address and default customer address.
Additional settings
The last tab here is to define additional settings.
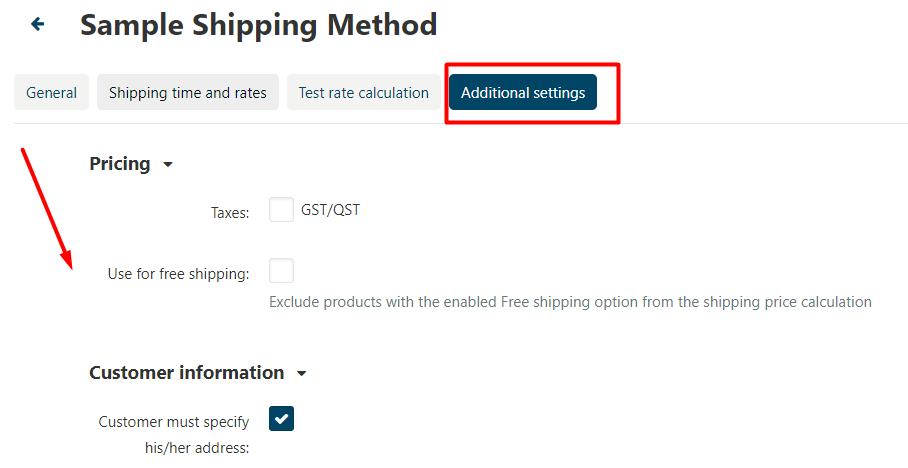
- Taxes— the tax rates that apply to the shipping method.
- Use for free shipping— tick the box so that the products with the Free shipping option enabled are not included in the calculation
- Customer must specify his/her address— tick the box if you want customers to specify their addresses.
Once you are done with adding all of the information, click on the Save button available at the top.
Your newly added shipping method will now appear in the list as shown below.
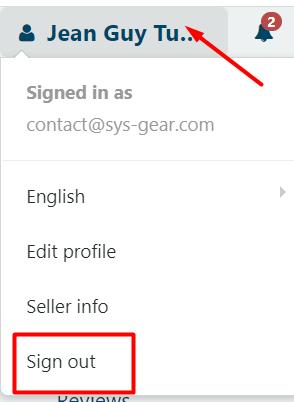
Logout
You can logout from the website by clicking on your username available at the top-left on your webpage.
Click on the Sign Out button and you will be redirected to the Login page.